Delicious Butter Cookies

Delicious Butter Cookies. During Christmas, my children love to make cookies. Of course, they love using fun cookie cutters to make cookies. Hence, I haven’t bought any icing to allow my children to decorate the cookies yet. Also, I worry that it would get extremely messy and be too sweet.

Delicious Butter Cookies Recipe

Delicious Butter Cookies

Ingredients:

pastry flour 1 1/2 cup

baking powder 1 1/2 tsp

salt 1 pinch

1/2 cup vegan butter

1/2 cup of sugar

1 large egg (room temperature)

1 tsp vanilla extract

Instructions:

  1. Firstly, with a medium-size blow sift flour, baking powder, and salt. Stir. And, set aside.
  2. Next, in a large bowl using an electric blender to blend butter until it is creamy. Afterward, add sugar little by little. Then, add in egg and vanilla extract.
  3. At this time, add in flour and mix.
  4. Furthermore, place dough in a bowl and wrap with plastic wrap. Following, refrigerate for one hour.
  5. In an hour, remove from the fridge. Sprinkle flour on the table surface. Following by, roll dough on the surface until the dough is 1/4 inches in thickness. Moreover, take your favorite cookie cutter to form shapes with the dough. Last but not least, line parchment paper on baking tray and place cut out dough on the pan.
  6. Once all the dough has been used up, bake at 350 degrees F for 10 – 12 minutes.
  7. Finally, let the cookies cool.
Delicious Butter Cookies

Melt in Your Mouth Cookie

To begin, when making butter cookies use cold butter instead of room temperature. Also, the batter is sticky, and it would be easier to manage when the butter is cold. Moreover, it is essential to chill the dough before cutting with the cookie cutter. The edges will appear cleaner. As well as that sprinkle with sparkling sand or coarse sugar, butter cookie is known for sprinkle sugar on the top.

Do try butter cookies. If you enjoy baked goods, do try the mini cinnamon roll. I would love to try more new recipes like homemade fish cookies.

Melt in Your Mouth Chocolate Pudding

Melt in Your Mouth Chocolate Pudding. As a result, my little girl loves chocolate. Whenever I am grocery shopping, I always see the Jello brand chocolate pudding. Hence, I decided to try homemade pudding by using dark chocolate chips. As well as using less sugar, I want to use natural sugar either maple syrup or honey.

Melt in Your Mouth Chocolate Pudding Recipe

Ingredients:

Dark Chocolate Chip 1 1/2 cup

non-dairy milk or milk 1 cup

unsweetened cocoa powder 1 tbsp

3 tsp maple syrup

1/2 tsp – 1 tbsp cornstarch

1 tsp vanilla extract

Instructions:

  1. Start by Turning on the stove at low heat, melt chocolate chips. Stir regularly to prevent it from sticking.
  2. Secondly, add cocoa powder, maple syrup, and milk. Whisk.
  3. Then, add cornstarch. Stir.
  4. Let it simmer while stirring regularly. Next, add in vanilla extract.
  5. Turn off the stove. Let the content cool.
  6. Finally, pour the chocolate mixture into small containers. And then, refrigerate for 1 hour before serving.
Melt in Your Mouth Chocolate Pudding

Make Pudding Special

Ways to elevate chocolate pudding, do change the type of dairy used instead of regular milk change to evaporated milk. Thus, evaporated milk makes the pudding richer and creamier. Also, the pudding will taste better by adding various toppings from fresh fruit to lighten the dessert. No only lighten the dessert, the treat will be more refreshing. By sprinkling chopped nuts on top of the pudding, the pudding will have more texture. Besides the above, if you want a twist to the treat do sprinkle with a little bit of cayenne. This will add a kick to the dessert.

Do try this pudding. If you enjoy homemade goods, do try cinnamon rolls. I would like to try more gluten-free dishes like Chocolate Cream Pie.

Very Chocolatey Cookie

Very chocolatey cookie. My daughter can’t resist anything with a chocolate chip on it either a snack or a treat. Therefore, I decided to make chocolate chips, which contain extra chocolate chips. Whereas I don’t want to have too much sugar all the time, I would make treats with chocolate chips once in a while. Therefore, this will satisfy her taste buds and I won’t be spoiling her all the time.

Very Chocolatey Cookie

1/2 cup butter(soft)

1/2 cup brown sugar

1/3 cup sugar

1 egg(large)

1 tsp vanilla

1/2 tsp baking soda

1/2 tsp Himalayan salt

1 1/3 cup gluten-free flour blend

1/4 cup potato starch

1 cup chocolate chip

Instructions:

  1. With a bowl, melt the butter, brown sugar, and sugar. Stir. Next, add in vanilla extract and egg. The mixture should be creamy.
  2. Furthermore, add salt, baking soda, gluten-free flour blend, and potato starch.
  3. Then, add chocolate chips. Moreover, take a spatula to fold the chocolate chips into the batter. Before baking, refrigerate for one hour.
  4. Preheat the oven to 350 degrees F. Place the parchment paper on the baking tray. Scoop with one tablespoon cookie dough on the tray. Finally, with the fingers or hand round the shape of the dough to make it nice and smooth.
  5. Hence, bake for 11 – 15 minutes. Do keep an eye on the cookie when the timer hits 10 minutes. The cookie should be brown on the top.

Health Benefits

In short, this recipe uses Himalayan salt. Surprisingly, this salt has many benefit for the body. Moreover, the salt has nutritional value is therapeutic, and adds unique flavors if anyone who loves to cook. On top of all that, Himalayan salt has 84 minerals and has trace elements. Consequently, a good choice to add this salt into your diet. Furthermore, Himalayan salt is good for the respiratory system. What salt does is to remove what is in the air and to lower the sensitivity to allergies. Also, this pink salt helps to balance ph.

Do try a very chocolatey cookie. If you enjoy baked goods, do try breakfast energy cookies. I would love to try other baked goods like coconut flan.

Sweet Jam thumbprint Cookies

Sweet Jam thumbprint Cookies. Furthermore, there is a bakery close to our place that my son seems to love cookies from them. Unfortunately, they are not gluten-free so I decided to try making these jam thumbprint cookies. They seem fun to make. Particularly, I love these vibrant cookies with different color jam on top. Also, the cookie is very soft like butter cookies.

Jam Cookies Recipe

Sweet Jam Imprint Cookies

Ingredient:

1 1/4 cup almond flour

1/4 cup coconut oil

3 tbsp maple syrup

1/4 cup jam (3/4 tsp per cookie)

pinch of salt

Instructions:

  1. Take a bowl, add the following ingredients almond flour, coconut oil, maple syrup, and salt.
  2. Then, wrap with the bowl with a plastic wrap. And, store in the fridge for half an hour.
  3. Then, turn on the oven to 350 degrees F. In a baking pan, lay parchment paper.
  4. Eventually, shape the batter into small balls. With your thumb, press down on the dough. Afterwards, scoop jam onto the center.
  5. Next, bake approximately 10 minutes. In the end, the cookie should be golden brown. In the case, If you like the bright color of the jam, scoop more fresh jam onto the center of the cookie.
  6. Allow the cookie to cool.
Sweet Jam Imprint Cookies

Toppings

There are more popular flavors for the cookie from strawberry, raspberry, blueberry to apricot. Fun thumbprint cookie toppings would be chocolate or with a nut mixture with some sugary syrup or salty-sweet peanut butter. Otherwise, almond flour makes the cookie high in protein low in carbohydrates. Coconut oil is healthy nutrition for the body. This recipe is dairy-free and grain-free.

What is your favorite jam topping? Do try sweet jam thumbprint cookies. If you enjoy baked goods, do try a gluten-free granola bar. I would love to try more gluten-free snack ideas like kale chips.

Beef broth pho

Beef broth pho. Weekly, we tend to have pho a Vietnamese noodle soup dish. The rich beef bone broth with strong meaty flavor made with a combination of Vietnamese spices. Pho is a fantastic gluten-free dish that uses rice noodles. A dish to have on a cold day. Noodle soup is a wonderful comfort food item.

Pho process

The noodle soup broth is made by cooking beef bones for many days. This allows the broth to have a strong flavor. Originally, the broth was just a simple dish made by cooking the bone broth. Later on, the broth improved by adding spices to improve in flavor. Spices used in the broth are basil, cilantro, etc. They can be different depending on the area.

Beef broth pho recipe

Beef broth pho

Ingredients

  • 1 – 2 lb short ribs

  • 4 oxtail

  • 4 bone marrow

  • 1 – 2 lb beef shank

  • 1 whole star anise

  • 1 stick of cinnamon

  • 6 pods of cardamons

  • 3 scallions

  • 1 whole nutmeg

  • 5 whole cloves

  • 5 – 10 oz of rice noodles

  • bunch of soybean sprouts

  • 10 scallions

  • 1/2 bunch of mint

  • 1/2 bunch of cilantro

  • 1/2 bunch Thai basil

  • 1 – 2lb thin sirloin steak meat

Directions

  • First cook the spices. In a frying pan, add in star anise, nutmeg, cinnamon, clove, and cardamom. This will bring out the aroma.
  • Place the spices in a bag for the soup.
  • Take the crockpot, put in scallions, bone marrows, oxtail, short rib, shank, and spice ball.
  • Pour in water to completely cover the ingredients.
  • Cook low 6 – 8 hours.
  • Once the soup is done. Use a strainer to separate the liquid from the content.
  • Bowl of soup:
  • In a small pot, pour in beef stock.
  • Once boiled add in rice noodle. Noodle should take 5 – 7 minutes. Once tender add in bean sprout and the thinly sliced meat. It should take 5 minutes.
  • Should be ready to serve.
Beef broth pho
Beef broth pho

Broth to Boost Immunity

Hearty broths are not only tasty but good for immunity. By adding lots of vegetables, the soup is full of healthy nutrition and bone broth. Bone broth is full of nutrients. There are numerous vitamins, calcium, magnesium, and phosphorous. The broth allows the body to absorb the cartilage since it has been brewing in the soup for long periods of time. Also, the broth allows the body to take in collagen. This broth is very good for the body.

Do try Beef broth pho. If you enjoy crockpot dishes do try a crockpot chicken and carb. I would love to try more crockpot dishes like crockpot Indian spiced chicken.

Lemon Cake Dessert

Lemon Cake Dessert. Last month my mother in law made a breakfast loaf my son couldn’t stop eating. I wanted to make something similar. Lemon helps to prevent the cake from becoming too heavy. Citrus makes the cake light and refreshing. A slice of lemon always brightens up a dish with a lovely yellow color. Also, lemon can help with the greasiness of the food.

Lemon Cake Dessert Recipe

Ingredients

  • 1/2 cup of olive oil

  • 1 cup of sugar

  • 1 lemon zest

  • 2 eggs (room temperature)

  • 1/2 cup non-dairy milk or almond milk

  • 2 tsp baking powder

  • 1/4 tsp salt

Directions

  • Turn on the oven to 350 degrees. Take a loaf pan. Brush with oil.
  • With a small dish, put in the zest of a lemon. Take a lemon and juiced it. Reduce the lemon juice in a small pot on a stove. Let it cool.
  • In a medium to a large bowl, whisk olive oil, sugar, and lemon juice.
  • Then, add one at a time. Mix to combine together.
  • Afterward, add in non-dairy milk and lemon juice. Combine.
  • In another bowl, mix dry ingredients gluten-free flour, baking powder, and salt.
  • Mix the dry ingredients into the wet mixture.
  • Scoop and pour the batter into the loaf pan. Bake for one hour.
  • Once done. Allow the loaf to cool.
Lemon Cake Dessert
Lemon Cake Dessert
Lemon Cake Dessert
Lemon Cake Dessert

Loaf goes with

What goes well with a loaf cake? A homemade fruit sauce with fresh berries or fruit cooked to reduce. How about a lovely jar of fruit jam from blueberries to strawberry jam. If the preference is to have a fruity loaf cake or just a simple icing on top. Another thing, this can be treated as a dessert after dinner maybe with a scoop of ice cream on top. A healthier option is to sprinkle some nuts on top.

Do try Lemon Cake Dessert. If you enjoy baked goods, why not give baked bagel a try. I would love to try a gluten-free English muffin.

Crunchy Gluten-free Waffle

Crunchy Gluten-free Waffle. Waffle made with sweet maple syrup. The fun part of the waffle is there are many different combinations for the batter. Or, there are many things to add to the batter to make it healthier or more nutritious. Do add Greek yogurt for a more moist waffle. Sprinkle some blended flax for more fiber. In fact, add in mashed banana or applesauce for a sweeter taste with natural sugar. Much less sugar in the batter, this will be a healthier breakfast.

Crunchy Gluten-free Waffle Recipe

 Crunchy Gluten-free Waffle

Ingredients

  • 2 cup of gluten-free flour

  • 1 tbsp. sugar or honey

  • 1/4 tsp salt

  • 1/2 tsp vanilla extract

  • 2 eggs (room temperature)

  • 1 3/4 non-dairy milk

  • 1/2 cup coconut oil

Directions

  • In a bowl, add the dry ingredients gluten-free flour, sugar, and salt. Mix to combine.
  • With another bowl, add all the wet ingredients vanilla extract, eggs, non-dairy milk, and coconut oil. Stir.
  • Pour the wet ingredients into the dry mixture. Whisk to the mixture together.
  • Take out a waffle maker. Spray or use a brush to apply oil on the surface.
  • Scoop batter into the waffle maker. Close the waffle maker. Once done. I like to flip the waffle to make it nice and crunchy. Note: this recipe makes 8 pieces.

Unique Flavor

If you are tired of the typical waffle, maybe it is time to be adventurous and to try different flavors. How about peanut butter with chocolate? By the way, if you are fond of chocolate do try it with grated orange. Furthermore, try a nutty waffle by using chickpea with an egg on top. How about making a cup of tea like London fog waffle with some whipped cream on top.

What would you like to try or experiment with? Do have some fun. Maybe fall with one of your combinations.

If you enjoy breakfast items, do try breakfast scones. I would love to try more breakfast items like gluten-free breakfast cake.

Join shareasale.com, Earn Cash!

Quick Veggie Dish

Quick Veggie Dish. Some days I just don’t know what to make for lunch or dinner. I look at my fridge for maybe some inspiration. Maybe something will call out to me. How about a vegetarian night. Nothing like a beautiful dish of colorful vegetables to get the kids to eat more vegetables.

Quick Veggie Dish Recipe

Ingredients:

3 red peppers

1 large onion

1 – 2 lb sausage

1/2 inch ginger

1 tbsp. olive oil

1/2 tsp Italian seasoning

1/2 tsp parsley

salt and pepper

Instructions:

1. Turn on the stove, add oil. Then, add sausage.

2. Sear all the sides of the sausage. It does not need to be fully cooked.

3. Place the sausage in the crockpot.

4. In the pan, cook onion and pepper.

5. lightly season the vegetables.

6. Toss the rest of the vegetables in the crockpot.

7. Sprinkle seasoning. Cook for 2 – 4 hours on low.

8. Enjoy!

Quick Veggie Dish
Quick Veggie Dish
Quick Veggie Dish
Quick Veggie Dish

One-Pot Vegetable Dish

This vegetable dish is not expensive and is healthy. One-pot vegetable stir fry. Good for busy nights and hectic ones. And what this helps with is to use up the vegetables in the refrigerator. Throw in whatever is in there. This prevents waste.

Combination of stir fry

There are many fun stir fry combinations to have:

  • broccoli, red pepper, mushroom and onions
  • slice carrot, snap pea, red pepper, and onion
  • ginger tofu with bok choi
  • bok choi, baby corn, and broccoli
  • shitake mushroom with bok choi
  • bell pepper, zucchini, and broccoli

Do try these stir fry combinations. Or try these quick vegetable dish.

If you enjoy vegetarian dishes, do try this leek soup. Next time, I would love to try new soup recipes.

Fig Bar Snack

Fig Bar Snack. We are home all the time my children are snack monsters. There is more opportunity to experiment with new ones. Now, I am attempting to focus on homeschooling my children at home. I never imagine I want to home school, my children. Some moms decide early on to homeschool all their children that is what they want. I admire that. However, I don’t think I have the patience to do this or maybe the skills. And of course, I am not a teacher. With all the studying the children are doing at home, I would need more healthy snacks for energy to replenish the body and the mind.

Fig Bar Snack Recipe

ingredients:

Filling:

1 1/2 cup dried figs

1/2 tsp ground cinnamon

1/4 cup almond milk

1/4 cup water

Crust:

1 3/4 cup almond flour

1/4 cup coconut flour

1 tsp ground cinnamon

1 tsp baking powder

1/2 tsp baking soda

3/4 cup applesauce

Fig Bar Snack
Fig Bar Snack
Fig Bar Snack
Fig Bar Snack

Instructions:

1. Take a baking pan, grease it. Preheat the oven 350-degree Fahrenheit.

2. Take a food processor, blend the dried figs until smooth. With a medium- size bowl, pour the blended figs in the bowl and the rest of the filling ingredients. Mix to combine. Set aside.

3. In a large bowl, mix the crust ingredients until the dough forms.

4. Put on a pair of plastic gloves. In a baking tray, press half of the crust on to the tray. Use a spoon to scoop the fillings, spread the fillings evenly on top of the crust. Then, add the rest of the crust and spread evenly. Press gently.

5. Bake for 30minutes. Remove from oven, allow to cool on a rack before slicing.

Note: the fig bar snack will last for 5 days.

Treat

This wonderful natural sweet gooey fig bar is a wonderful treat. This can be a snack or a treat. When I go shop with my children, my daughter always wants a box of fig bar snacks. Constantly, I remind myself to try making these treats at home, but never got around to attempting it. Figs have a good amount of fiber. It keeps the stomach filling full. Another benefit, figs may even lower cholesterol and controls blood sugar. Surprisingly, fig gives body calcium. If anyone is concerned about osteoporosis, figs will help with this.

Why not give fig bar snack a try. If you are looking for breakfast coconut flour crepes, do read my previous post. I would love to try more interesting recipes like artisan loaf.

Coconut Flour Crepe

Coconut Flour Crepe. Crepes are a lot of fun. They can be sweet and savory. My children love the sweet ones. C and O like to have berries with whip cream. Whip cream is a lot of fun and is delicious. Or, the crepe can be eaten as a dessert with ice cream. What a treat.

Coconut Flour Crepe Recipe

Ingredients:

4 egg

1/2 tbsp. coconut oil(liquid)

1/2 tsp vanilla extract

2 tbsp. coconut flour

1 tbsp. tapioca flour

1/4 tsp salt

Coconut Flour Crepe
Coconut Flour Crepe
Coconut Flour Crepe

Instructions:

1. In a bowl, crack the eggs. Beat the eggs.

2. Then, add in water, coconut oil, and vanilla. Mix. Do add coconut flour, tapioca starch, and salt.

3. Take a whisk to mix and combine. Whisk until there are no clumps.

4. Allow the batter to sit for 10-12 minutes.

5. Spray the pan to prevent sticking.

6. Turn on the stove and pour a scoop of the batter into the pan. Spread it evenly in the pan.

7. Once done. Serve on a plate with your favorite toppings.

History of Crepes

What are crepes? These crepes are thin pancakes. Originated from France. In this past, these are made from salt, water, and flour. The mixture is spread with a wooden scraper to ensure it is round and thin. Thin pancakes can be simple or complex.

Snack

These Coconut flour crepes are high in protein. The treats are nice and thin. Fantastic on the go snacks. An easy one would be with Nutella spread on the inside. Switch the crepe by changing the filling, how about using ricotta to make it creamy. To make a fun snack, let the children drizzle the chocolate syrup or strawberry syrup on top. Building their crepe would be very exciting and fun. Do try coconut flour crepes.

Do try soup good for the body like watercress soup you can have regularly to increase water intake. I would love to try more Chinese soups. And, I would love to try soups like Egg drop soup.

Snack Flatbread and Dip

Snack flatbread and dip. Now, my children are indoors due to the current situation. I need more snack ideas. They have fruits but the kids do love bread and dipping sauce. Therefore, this time I decided to tried feta honey dip with flatbread. Snack flatbread and dip can be served in small pieces or added with different toppings while eaten with the dips.

Flatbread

My children do not have all there molars yet. Or, their teeth are not as strong, so I need to serve food easy for my children to have. Flatbread is great. If the bread is not cooked for too long, the bread is nice and soft. Thin bread is easy for my children to have. To add flavor to the bread, when making the batter add chives or by adding herbs for tasty bread. The snack flatbread dip can be very flavorful and fun.

Feta Honey Dip Recipe

Snack Flatbread and Dip

Ingredient:

4 oz crumbled feta cheese

1 tbsp olive oil

1/2 tsp dried basil

1/2 tsp black pepper

4 oz cream cheese (room temperature)

1/2 tsp minced garlic

1/4 cup honey

1 tsp finely chopped chives

Equipment:

Ninja Master Prep Blender

Snack Flatbread and Dip

Instructions:

1. Combine feta cheese, cream cheese and olive oil in a food processor. The texture should be smooth.

2. Add basil and garlic.

3. In a small bowl, scoop the cheese. Add honey and mix to combine.

4. Sprinkle chives on top. For more flavor add black pepper.

Snack Flatbread and Dip


Gluten-free Flatbread Recipe:

Ingredients:

1 cup greek yogurt

2 tsp baking powder

2 cup gluten-free flour

salt

Instructions:

1. In a medium to large size bowl, add in yogurt, gluten-free flour, baking powder, and salt. Mix to combine.

2. Apply flour on the table surface. Take the dough and roll on the table surface to about 8 inches.

3. Then, cut the dough into 4 parts. Shape it into round shapes.

4. Turn on the stove. With a non-stick pan, add oil or use a spray and add the dough.

5. Cook on both sides. Give both sides a nice brown color.

6. Allow to cooling before eating.

Snack Flatbread and Dip

Sometimes I find being a mom interesting you have been super creative with what you have. It might be what little I have in my fridge or just simply switching things around. Besides adding to the batter, I can use the flatbread to add toppings like a mini pizza. Simply, adding tomato sauce with basil. Then, just by adding flavor cheese makes it interesting. Do try snack flatbread and dip.

If you love crockpot recipes, do try crockpot beef and broccoli.

I would love to make a granola bar like quinoa granola bar.

Crockpot Saucy Sloppy Joes

Crockpot Saucy Sloppy Joes. I love trying new recipes which can be fun and messy for children. Kids are messy but why not let them have fun once in a while. Sloppy joes are sweet kids would love it. The meal is saucy and can be extremely messy maybe having bibs would be good for them.

Crockpot Saucy Sloppy Joes Recipe

Ingredients:

2 pound of lean ground beef

1 medium onion

2 clove of garlic (minced)

1 cup of ketchup

1/2 cup bell pepper (remove seed and chop)

3 tbsp. Worcestershire sauce

3 tbsp. brown sugar

2 tbsp. mustard

2 tbsp. cider vinegar

Instructions:

Crockpot Saucy Sloppy Joes

1. In a pan, add oil to cook garlic and then the onion. Browned the ground beef.

2. Place the ground beef with garlic in the crockpot. Then, add the rest of the ingredients in the crockpot.

3. Cook for 4-6 hours on low. Make sure there is liquid or it will burn.

4. Once cooked. Take a burger bun and add it in the middle.

If you do not have burger buns, you can serve with brown rice.

Sneaking in Healthy Nutrient

  • hide some grated carrots
  • shred some spinach
  • blend in kale
  • pour in bone broth

Crockpot Saucy Sloppy Joes Dish

Sloppy joes originated in the United States. Sloppy joes started with the loose meat sandwich. The cook was mixing loose meat with tomato sauce that is how sloppy joes came to be. Do elevate the dish with homemade ketchup from your very own kitchen. Or, simply using tomatoes to give the dish a fresher taste. Why not try crockpot saucy sloppy joes.

If you love crockpot recipes, do try crockpot beef and broccoli.

I would love to make a granola bar like quinoa granola bar.

Crockpot Chicken Soup Korean Inspired

Crockpot Chicken Soup Korean Inspired. This soup is good to strengthen the body. Korean do tend to like adding a lot of garlic to the chicken soup. Garlic helps the body fight colds. It lowers blood pressure and improves the cholesterol level. There are many benefits to eating garlic.

Crockpot Chicken Soup Korean Inspired Recipe

Ingredients:

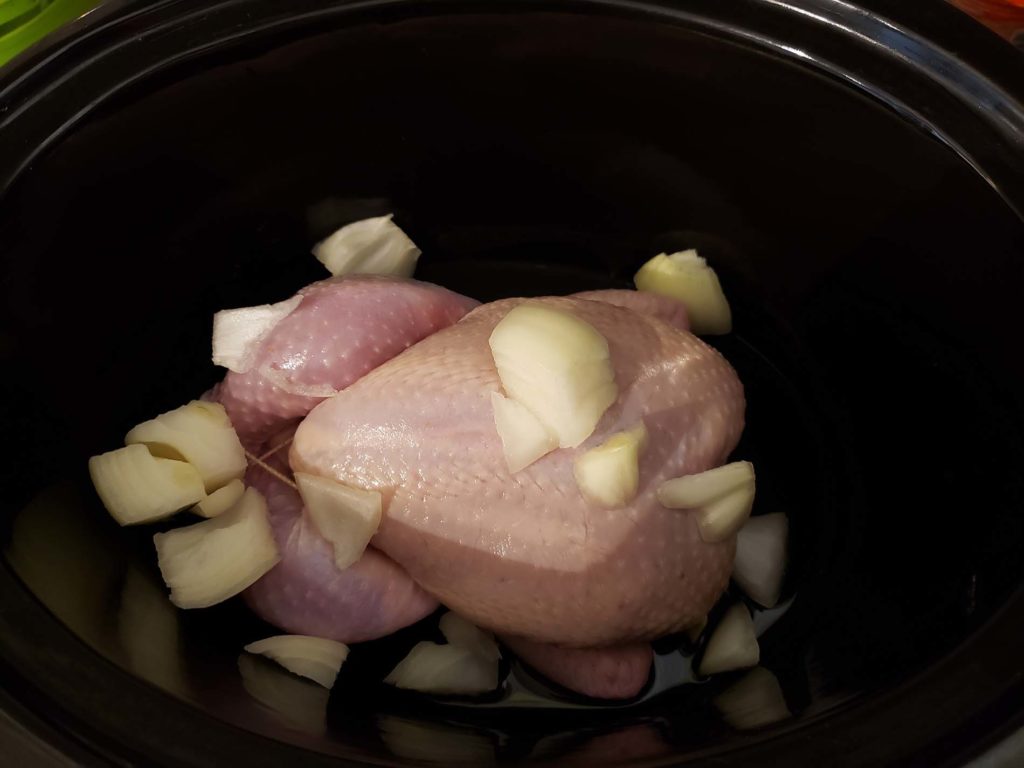
1 whole chicken

8 garlic (cloves)

3 – 4 slice of ginger

1 /2 onion

2 scallions

Crockpot Chicken Soup Korean Inspired

Instructions:

1. Clean the chicken and place it in the crockpot. Fill the pot to cover the chicken.

2. Add the rest of the ingredients in the crockpot.

3. Set the timer to 6 – 8 hours on low.

4. Take the chicken and place it on a plate. Remove all the meat from the chicken.

5. Serve in a bowl with rice and shredded chicken on the top. And add a scoop of soup.

Strengthen Immunity

With the virus, it is a good idea to strengthen the body to protect the body. Bone broth is an excellent way to strengthen the body’s immunity. With every meal, do add bone broth while preparing the meal to add more nutrient. In the beginning, it might be tricky to remember but start once a day than slowly increase the amount. Or, regularly consuming nutrient-rich food is good for the body. The body can resist infection. And, the body has a bigger chance to beat the infection. It is important to get plenty of exercises, to have 7 – 8 hours of sleep and a healthy diet. Do try crockpot chicken soup Korean inspired.

If you like crockpot meal, do try crockpot honey garlic chicken.

Or, I would love to attempt simple crockpot easy meals like bbq short ribs.

Crockpot Chicken and Carb

Crockpot Chicken and Carb. This week has been a little chaotic. I am trying a new routine trying by entertain my kids while doing my mommy duties. Now, there are no school and no activities, it has been a lot tougher to get things done. This is where my crockpot becomes very handy. The one I have has a timer to set the amount of time needs to cook the dish. Once cooked the crockpot will switch the setting to warm. It is quite easy to use and fantastic for Moms who wants to provide a nutritious meal for the family.

Crockpot Chicken and Carb Recipe

Ingredient:

1 cup of brown rice

1 – 2 chicken breast

1/2 cup pea

1/2 cup of corn

1 tbsp. Dijon mustard

1/2 tsp garlic powder

1/2 tsp kosher salt

1 tsp dried thyme

1/4 tsp ground black pepper

2 1/2 cup chicken broth

1/2 cup plain Greek yogurt

1/4 – 1/2 cup of grated cheddar cheese

Instructions:

1. Spray the inside of the crockpot to prevent sticking. Put in the following items rice, carrot, shallot, and Dijon mustard. Mix to combine. Place chicken on the top.

2. Sprinkle garlic powder, thyme, salt, and pepper. Add in the chicken broth. Cook for 2 1/2 hours. Use a meat thermometer to check the meat is cooked.

3. Set aside the chicken on a plate and to keep it warm.

4. Stir the rice and the vegetable. Check to see if the rice and vegetables need more cooking time. If the ingredients need more time, cook for another half an hour to one hour.

5. Scoop yogurt into the crockpot. Mix the ingredients together.

6. Cut the chicken into dice size. Add in the cheese. Let it cook for another half an hour. Mix.

7. Once done. Serve on a bowl.

8. Enjoy!

Crockpot Chicken and Carb

Crockpot Dish

There are many benefits of using a crockpot. The slow cooker or crockpot cook dishes at a low temperature. Therefore, the protein will remain tender and delicious. And, the crockpot gives the meat a huge amount of flavors by slow cooking the meat. Chicken, pork or beef will be flavorful and juicy. Nothing like coming home and being welcomed by the aroma of the dinner ready in the crockpot. Also, nothing like the delicious smell of dinner throughout the house. Another positive about using a crockpot does not use a lot of electricity. Do try crockpot and carb.

If you love a quick and simple crockpot meal, do try crockpot Dijon chicken which is tangy and sweet.

I love to try a delicious dish like slow cooker honey balsamic pull pork.

Spiral noodle adding more vegetable to your meal

Spiral noodle adding more vegetables to your meal is a very healthy option. My children love carbohydrates like bread and cookies especially my little girl. Now, she can have some bread with gluten but I don’t want her to have too much. I don’t want her eczema to flare up. Spiral vegetable noodle will add more vegetable or sweet potato chips would be great for my little ones.

Meal Preparation

  • Carrot: place in a Ziploc. Keep in the refrigerator for one week. This can be frozen.
  • Zucchini: moist vegetables. Seal in Ziploc bag. Good for 3 – 4 days.
  • Beet: place in an airtight container. It will last for 5 days.
  • Bell pepper: Add to a Ziploc bag. Good for 5 days.
  • Butternut squash: Can be stored for 5 days in the fridge. Does store in the freezer.
  • Onion: A moist vegetable. Store in Ziploc bag for 2 – 3 days.

Parmesan Zucchini Noodle

Spiral noodle adding more vegetable to your meal

Ingredients:

2 – 4 zucchini

2 tbsp. olive oil

optional: 1/ 4 cup cherry tomato

1/4 cup parmesan cheese

1 cup basil

1 – 2 cloves of garlic

salt and pepper

Instructions:

1. Rinse the zucchinis. Cut the ends of the zucchini. Put the vegetable through the spiralizer machine.

2. If the noodle is too long, cut it to shorten the noodle.

3. Turn on the stove, add olive oil to the pan. The heat should be medium.

4. Saute garlic. Place the zucchini noodle in the pan. Stir the noodles to prevent from sticking.

5. Note: Do not overcook the zucchini. Zucchini can become mushy when I cooked for too long.

6. Sprinkle the parmesan cheese on the top. Mix.

7. Add in the tomato, basil, and more parmesan cheese for more flavor.

8. Season with salt and pepper for more taste.

Why Spiral Vegetable?

  • A fun colorful dish for children
  • More vegetable is healthier for the family
  • Bake spiral chip to snack on
  • The spiral vegetable can be eaten as a fun colorful salad
  • Gives more texture to the dish
  • The flat vegetable can make chip or fries
  • If you are trying to decrease in carbohydrates and increase in vegetable, use sweet potato or a hearty and filling vegetable

Do give Spiral Noodle adding more vegetables to Your Meal. You will feel healthier. Short on time. Spend one hour a week meal preparation to make in fridge or freezer bags of vegetables to be stored.

If you enjoy more vegetables in your diet, do try creamy leek soup.

Or, something different like spinach banana muffin.

Pad Thai with Zucchini Noodles

Pad Thai with Zucchini Noodles. My mission for the next couple of weeks is to increase the number of vegetables into our diet. Therefore, I use zucchini to make fun crunchy noodles. The flavors of Thai cuisine are lovely with a sweet and sour mix in with spiciness. Unfortunately, my children are very sensitive to spicy food. The focus is the sweet and sourness of the cuisine in my household.

Pad Thai with Zucchini Noodles. My mission for the next couple of weeks is to increase the number of vegetables into our diet. Therefore, I use zucchini to make fun crunchy noodles. The flavors of Thai cuisine are lovely with a sweet and sour mix in with spiciness. Unfortunately, my children are very sensitive to spicy food. The focus is the sweet and sourness of the cuisine in my household.

Pad Thai with Zucchini Noodles Recipes

Pad Thai with Zucchini Noodles

Ingredients:

1 – 2 lbs ham

2 tbsp. rice vinegar

one tbsp. fish sauce

1/2 tsp – 1 tbsp. lime juice

1 1/2 tbsp. honey

2 eggs

1 tbsp. peanut oil

3 – 4 garlic cloves

2 large zucchini

1 tsp cilantro

Instructions:

1. In a bowl, mix rice vinegar, fish sauce, lime juice, and honey.

2. Turn on the stove, add oil in the pan. Cook egg scramble gently.

3. Wash pan. In the pan, add oil and cook chicken. Once done set aside.

4. Saute garlic. Place zucchini in the pan. Cook for 5 minutes. Put in scallions. Cook for 2 minutes.

5. Pour in the sauce. Mix with noodles and the meat. Add in the eggs.

6. Cook for 5 – 10 minutes.

7. Ready to be served.

8. Season with salt and pepper.

Thai Cuisine

This cuisine uses a mix of meats and seafood with vegetables. What types of spices are being used? /They use garlic, pepper, and fish sauce. Chinese introduce noodles to Thailand. Therefore, the dishes are either rice or noodles. Surprisingly, Thai food is influence by Indian curries. Curries, they have are slightly different they have red, yellow, and green curries. Other spices used are Thai holy basil, lemongrass, and Thai ginger.

Thai dish

Thai dishes are sweet, spicy and tangy. There a combination of meat and vegetable. Do try pad Thai with zucchini noodles.

If you want to eat healthier or build stronger immunity, do try bone broth.

Or, trying dishes with more vegetable cauliflower parmesan.