Sweet Jam thumbprint Cookies

Sweet Jam thumbprint Cookies. Furthermore, there is a bakery close to our place that my son seems to love cookies from them. Unfortunately, they are not gluten-free so I decided to try making these jam thumbprint cookies. They seem fun to make. Particularly, I love these vibrant cookies with different color jam on top. Also, the cookie is very soft like butter cookies.

Jam Cookies Recipe

Sweet Jam Imprint Cookies

Ingredient:

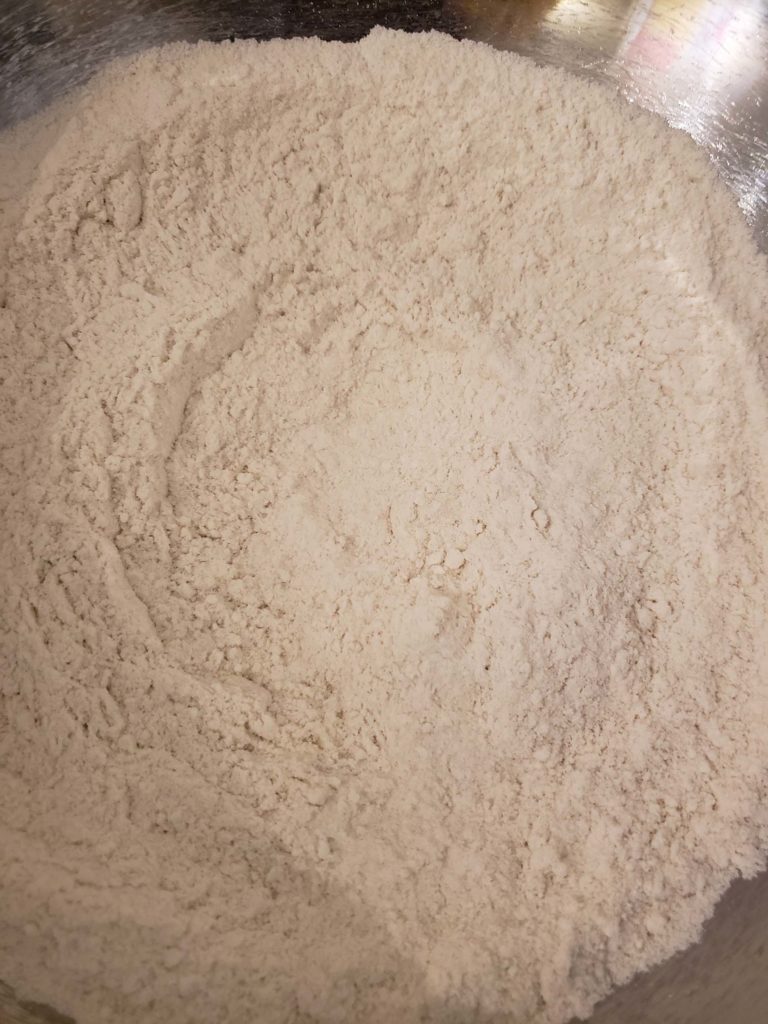
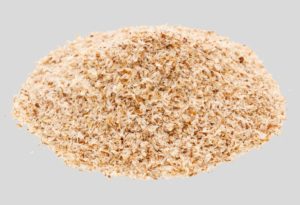
1 1/4 cup almond flour

1/4 cup coconut oil

3 tbsp maple syrup

1/4 cup jam (3/4 tsp per cookie)

pinch of salt

Instructions:

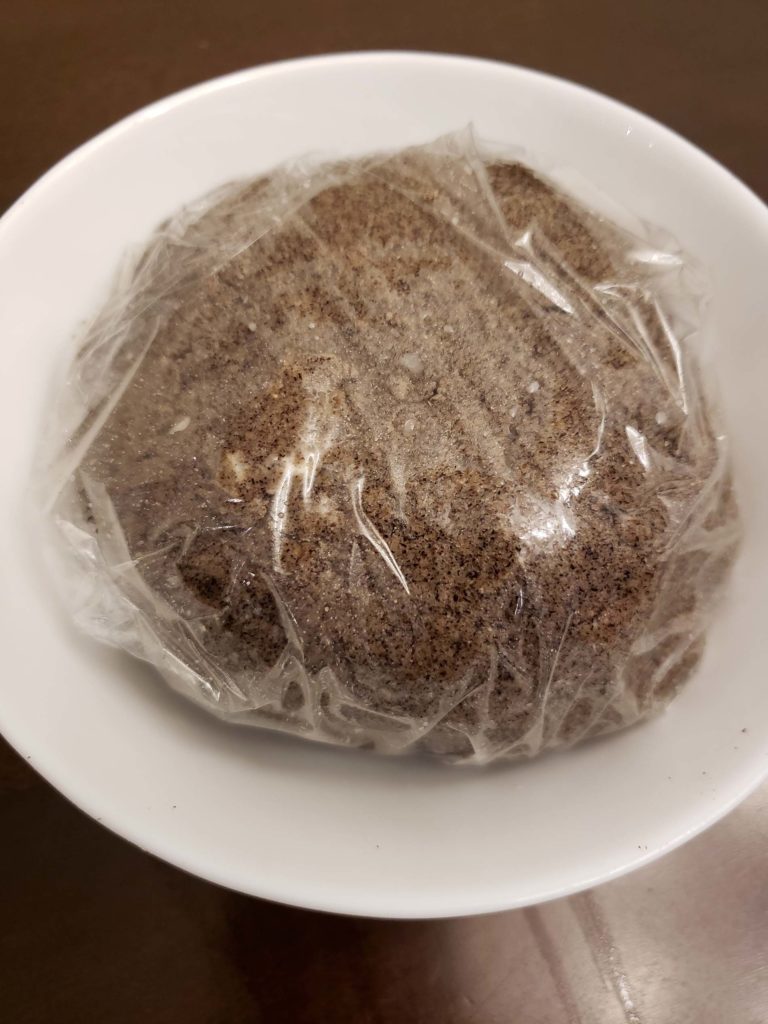
  1. Take a bowl, add the following ingredients almond flour, coconut oil, maple syrup, and salt.
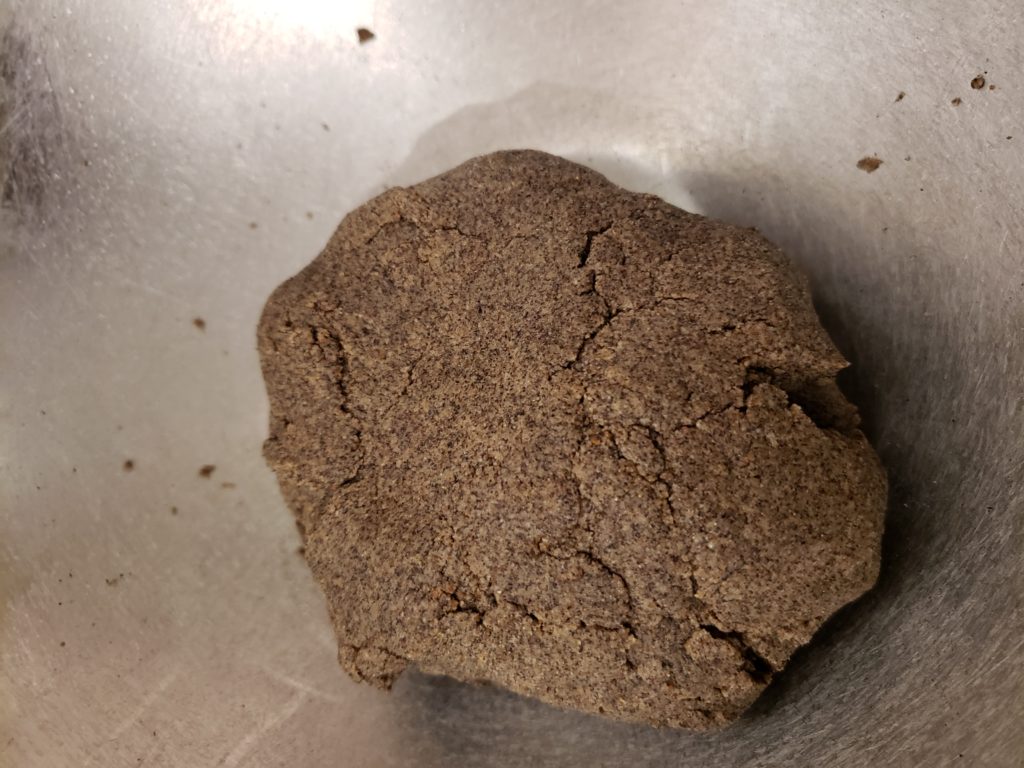
  2. Then, wrap with the bowl with a plastic wrap. And, store in the fridge for half an hour.
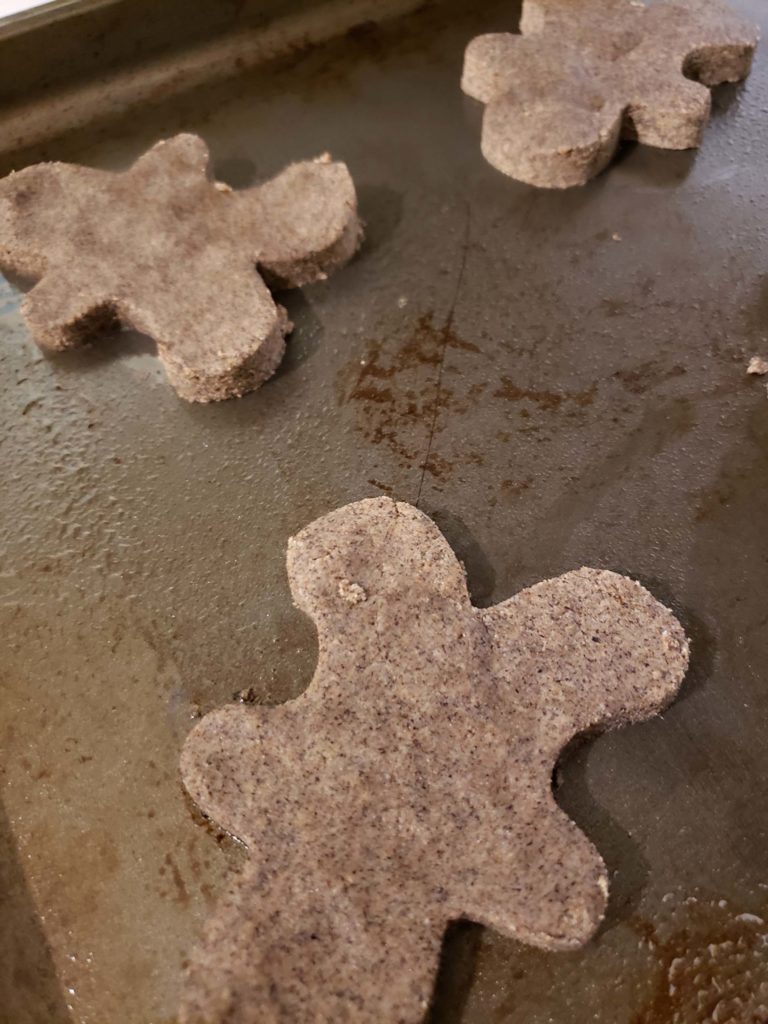
  3. Then, turn on the oven to 350 degrees F. In a baking pan, lay parchment paper.
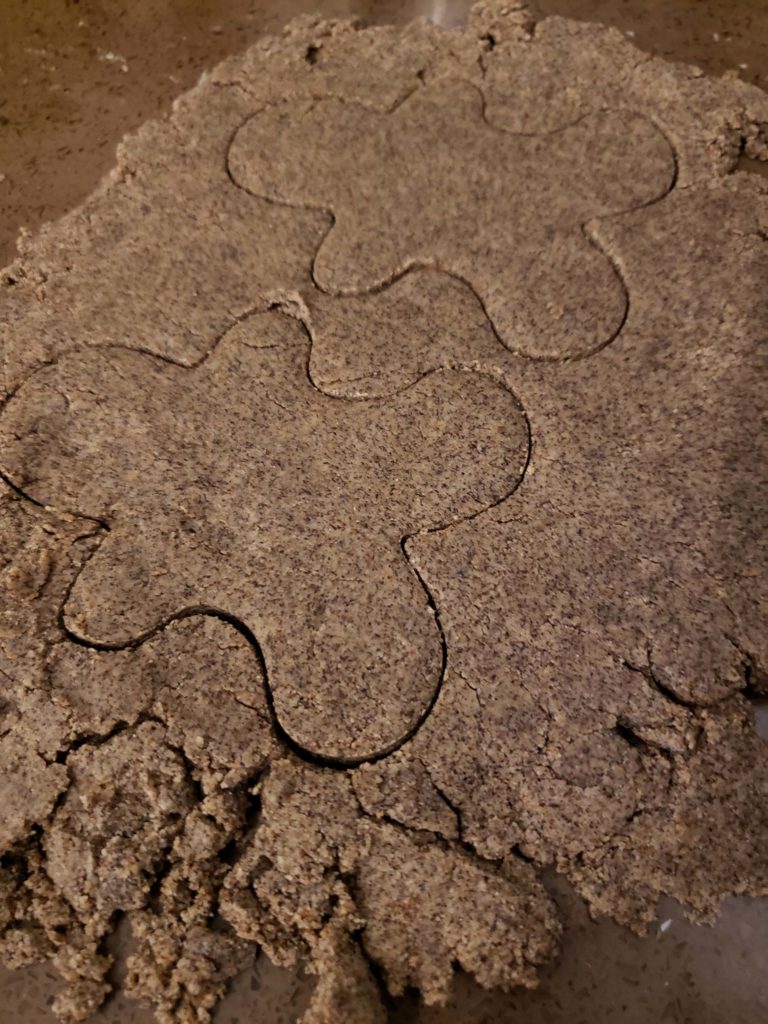
  4. Eventually, shape the batter into small balls. With your thumb, press down on the dough. Afterwards, scoop jam onto the center.
  5. Next, bake approximately 10 minutes. In the end, the cookie should be golden brown. In the case, If you like the bright color of the jam, scoop more fresh jam onto the center of the cookie.
  6. Allow the cookie to cool.
Sweet Jam Imprint Cookies

Toppings

There are more popular flavors for the cookie from strawberry, raspberry, blueberry to apricot. Fun thumbprint cookie toppings would be chocolate or with a nut mixture with some sugary syrup or salty-sweet peanut butter. Otherwise, almond flour makes the cookie high in protein low in carbohydrates. Coconut oil is healthy nutrition for the body. This recipe is dairy-free and grain-free.

What is your favorite jam topping? Do try sweet jam thumbprint cookies. If you enjoy baked goods, do try a gluten-free granola bar. I would love to try more gluten-free snack ideas like kale chips.

Japchae zucchini noodles

Japchae zucchini noodles. Lately, I haven’t cooked noodles as often as I would like. In the past, I would cook at least once per week. My children love noodles, but they can be time-consuming. So, vegetable preparation can take more time to prepare. For a change, I would prepare the vegetables the night before. Clearly, what I did is to shred the zucchini with the spiralizer. And, I can peel the skin f the zucchini vegetable so the zoo noodle resembles noodles. Undoubtedly, food preparation can be a little challenging for my children around all the time. However, do spend some time the night before or morning before children wake up does help or reduce the stress level.

Japchae zucchini noodles recipe

Ingredients:

potatoes noodle 4 oz

boneless chicken thigh 4 – 5 lbs

garlic 4

brown sugar 2 tbsp

gluten-free soya sauce 2 tbsp.

sesame oil 2 tbsp.

sesame seed 1 tbsp.

egg 1

green onion 1

onion 1 cup

bell pepper 1/2 cup

salt and pepper

optional: 2 cups of spinach

Instructions:

Japchae zucchini noodles

1. With a bowl, mix in garlic, sugar, soy sauce, and sesame oil. Mix to combine. Take the sauce to marinate the meat.

2. Use the spiralize to spiral the zucchini.

3. On a stove, cook the egg. Do scramble it. Importantly, do not overcook it.

4. To prepare the noodles, boil the water and cook the glass noodle for about 6 – 8 minutes. Strain. Finally, run under cold water. In a pan, add oil and gently cook the zucchini noodles.

5. Use a pan, sauté the meat. Cook the meat until brown.

6. Definitely, cook onion and green onion next. Once cooked, add in the spinach.

7. In a separate container, add garlic, 1 tbsp. soy sauce, and 1 tbsp of sesame oil. Finally, pour the sauce on the noodles. Mix to combine. Then, add in the vegetables and eggs

8. Allow the noodles to cook another 5 – 10 minutes.

9. Ready to serve.

If you enjoy noodle dish, do try Pad thai. I would love to try breakfast dishes like chocolate peanut butter muffins.

Gluten-free Scones

Gluten-free Scones. My hubby loves scones. The kids do like the cheesy ones. Who can resist the flaky buttery goodness of the soft scones. Scones are a wonderful breakfast item to have with tea or coffee. How about splitting the scones and adding a little bite of jam. With bake goods, I always love breakfast items. They can be a lot of fun. It is amazing what you can do with flour. Flour can be used to make all these tasty treats.

Gluten-free Scones Recipe

2 cup of gluten-free flour

1/4 cup extra flour (this is for rolling the dough or transfer to baking tray)

1/2 cup sugar

2 tsp baking powder

1/8 tsp salt

2 egg

1/2 cup non-dairy milk

1 tsp vanilla extract

1/2 cup of butter(cold)

Optional: 1/2 cup toppings like blueberries/cheddar cheese

Instructions:

1. Pre-head the oven. Oven should be 350-F.

2. With a bowl, add in gluten-free flour, sugar, baking powder, and salt.

3. Cold butter should be cut into small chunks. Add in to the bowl with the dry mix.

4. If you have a pastry blender to get the butter into the flour. Or, I used a potato masher to do the same. Do this until the butter is in little pieces.

5. In a bowl, add in the eggs, almond milk and vanilla extract. Blend together.

6. Mix the wet ingredients with dry ingredients.

7. This would be a good time to add fruit like raspberry, strawberry, or blueberry. Fold gently with fruits.

8. Use a baking tray and lay parchment paper on top. Sprinkle flour on the surface of the parchment paper.

9. Flatten dough and put a wax paper on top. If the dough has too much butter, the dough is too soft. Do use a spoon to scoop the batter on the
baking sheet. The dough should be 1 inch to 1 1/2 inches.

10. Cut circle with biscuit cutter.

11. Bake 20 – 22 minutes.

12. Allow the scone to cool.

Gluten-free Scones
Gluten-free Scones
Gluten-free Scones

Things to know about Scones

These small bread like cake orginated from Scotland. Scones begin in the 1513. There are many variations where English scones are served with butter, jam or cream. American scones types are sweeter and richer in flavor. Scones should be moist with crumbly on the outer layer. Of course, these scones should be buttery. Do try these gluten-free scones.

If you enjoy baked goods, do try gingerbread cookie. I would love to try new cake recipes.

Fig Bar Snack

Fig Bar Snack. We are home all the time my children are snack monsters. There is more opportunity to experiment with new ones. Now, I am attempting to focus on homeschooling my children at home. I never imagine I want to home school, my children. Some moms decide early on to homeschool all their children that is what they want. I admire that. However, I don’t think I have the patience to do this or maybe the skills. And of course, I am not a teacher. With all the studying the children are doing at home, I would need more healthy snacks for energy to replenish the body and the mind.

Fig Bar Snack Recipe

ingredients:

Filling:

1 1/2 cup dried figs

1/2 tsp ground cinnamon

1/4 cup almond milk

1/4 cup water

Crust:

1 3/4 cup almond flour

1/4 cup coconut flour

1 tsp ground cinnamon

1 tsp baking powder

1/2 tsp baking soda

3/4 cup applesauce

Fig Bar Snack
Fig Bar Snack
Fig Bar Snack
Fig Bar Snack

Instructions:

1. Take a baking pan, grease it. Preheat the oven 350-degree Fahrenheit.

2. Take a food processor, blend the dried figs until smooth. With a medium- size bowl, pour the blended figs in the bowl and the rest of the filling ingredients. Mix to combine. Set aside.

3. In a large bowl, mix the crust ingredients until the dough forms.

4. Put on a pair of plastic gloves. In a baking tray, press half of the crust on to the tray. Use a spoon to scoop the fillings, spread the fillings evenly on top of the crust. Then, add the rest of the crust and spread evenly. Press gently.

5. Bake for 30minutes. Remove from oven, allow to cool on a rack before slicing.

Note: the fig bar snack will last for 5 days.

Treat

This wonderful natural sweet gooey fig bar is a wonderful treat. This can be a snack or a treat. When I go shop with my children, my daughter always wants a box of fig bar snacks. Constantly, I remind myself to try making these treats at home, but never got around to attempting it. Figs have a good amount of fiber. It keeps the stomach filling full. Another benefit, figs may even lower cholesterol and controls blood sugar. Surprisingly, fig gives body calcium. If anyone is concerned about osteoporosis, figs will help with this.

Why not give fig bar snack a try. If you are looking for breakfast coconut flour crepes, do read my previous post. I would love to try more interesting recipes like artisan loaf.

Coconut Flour Crepe

Coconut Flour Crepe. Crepes are a lot of fun. They can be sweet and savory. My children love the sweet ones. C and O like to have berries with whip cream. Whip cream is a lot of fun and is delicious. Or, the crepe can be eaten as a dessert with ice cream. What a treat.

Coconut Flour Crepe Recipe

Ingredients:

4 egg

1/2 tbsp. coconut oil(liquid)

1/2 tsp vanilla extract

2 tbsp. coconut flour

1 tbsp. tapioca flour

1/4 tsp salt

Coconut Flour Crepe
Coconut Flour Crepe
Coconut Flour Crepe

Instructions:

1. In a bowl, crack the eggs. Beat the eggs.

2. Then, add in water, coconut oil, and vanilla. Mix. Do add coconut flour, tapioca starch, and salt.

3. Take a whisk to mix and combine. Whisk until there are no clumps.

4. Allow the batter to sit for 10-12 minutes.

5. Spray the pan to prevent sticking.

6. Turn on the stove and pour a scoop of the batter into the pan. Spread it evenly in the pan.

7. Once done. Serve on a plate with your favorite toppings.

History of Crepes

What are crepes? These crepes are thin pancakes. Originated from France. In this past, these are made from salt, water, and flour. The mixture is spread with a wooden scraper to ensure it is round and thin. Thin pancakes can be simple or complex.

Snack

These Coconut flour crepes are high in protein. The treats are nice and thin. Fantastic on the go snacks. An easy one would be with Nutella spread on the inside. Switch the crepe by changing the filling, how about using ricotta to make it creamy. To make a fun snack, let the children drizzle the chocolate syrup or strawberry syrup on top. Building their crepe would be very exciting and fun. Do try coconut flour crepes.

Do try soup good for the body like watercress soup you can have regularly to increase water intake. I would love to try more Chinese soups. And, I would love to try soups like Egg drop soup.

Snack Flatbread and Dip

Snack flatbread and dip. Now, my children are indoors due to the current situation. I need more snack ideas. They have fruits but the kids do love bread and dipping sauce. Therefore, this time I decided to tried feta honey dip with flatbread. Snack flatbread and dip can be served in small pieces or added with different toppings while eaten with the dips.

Flatbread

My children do not have all there molars yet. Or, their teeth are not as strong, so I need to serve food easy for my children to have. Flatbread is great. If the bread is not cooked for too long, the bread is nice and soft. Thin bread is easy for my children to have. To add flavor to the bread, when making the batter add chives or by adding herbs for tasty bread. The snack flatbread dip can be very flavorful and fun.

Feta Honey Dip Recipe

Snack Flatbread and Dip

Ingredient:

4 oz crumbled feta cheese

1 tbsp olive oil

1/2 tsp dried basil

1/2 tsp black pepper

4 oz cream cheese (room temperature)

1/2 tsp minced garlic

1/4 cup honey

1 tsp finely chopped chives

Equipment:

Ninja Master Prep Blender

Snack Flatbread and Dip

Instructions:

1. Combine feta cheese, cream cheese and olive oil in a food processor. The texture should be smooth.

2. Add basil and garlic.

3. In a small bowl, scoop the cheese. Add honey and mix to combine.

4. Sprinkle chives on top. For more flavor add black pepper.

Snack Flatbread and Dip


Gluten-free Flatbread Recipe:

Ingredients:

1 cup greek yogurt

2 tsp baking powder

2 cup gluten-free flour

salt

Instructions:

1. In a medium to large size bowl, add in yogurt, gluten-free flour, baking powder, and salt. Mix to combine.

2. Apply flour on the table surface. Take the dough and roll on the table surface to about 8 inches.

3. Then, cut the dough into 4 parts. Shape it into round shapes.

4. Turn on the stove. With a non-stick pan, add oil or use a spray and add the dough.

5. Cook on both sides. Give both sides a nice brown color.

6. Allow to cooling before eating.

Snack Flatbread and Dip

Sometimes I find being a mom interesting you have been super creative with what you have. It might be what little I have in my fridge or just simply switching things around. Besides adding to the batter, I can use the flatbread to add toppings like a mini pizza. Simply, adding tomato sauce with basil. Then, just by adding flavor cheese makes it interesting. Do try snack flatbread and dip.

If you love crockpot recipes, do try crockpot beef and broccoli.

I would love to make a granola bar like quinoa granola bar.

Pad Thai with Zucchini Noodles

Pad Thai with Zucchini Noodles. My mission for the next couple of weeks is to increase the number of vegetables into our diet. Therefore, I use zucchini to make fun crunchy noodles. The flavors of Thai cuisine are lovely with a sweet and sour mix in with spiciness. Unfortunately, my children are very sensitive to spicy food. The focus is the sweet and sourness of the cuisine in my household.

Pad Thai with Zucchini Noodles. My mission for the next couple of weeks is to increase the number of vegetables into our diet. Therefore, I use zucchini to make fun crunchy noodles. The flavors of Thai cuisine are lovely with a sweet and sour mix in with spiciness. Unfortunately, my children are very sensitive to spicy food. The focus is the sweet and sourness of the cuisine in my household.

Pad Thai with Zucchini Noodles Recipes

Pad Thai with Zucchini Noodles

Ingredients:

1 – 2 lbs ham

2 tbsp. rice vinegar

one tbsp. fish sauce

1/2 tsp – 1 tbsp. lime juice

1 1/2 tbsp. honey

2 eggs

1 tbsp. peanut oil

3 – 4 garlic cloves

2 large zucchini

1 tsp cilantro

Instructions:

1. In a bowl, mix rice vinegar, fish sauce, lime juice, and honey.

2. Turn on the stove, add oil in the pan. Cook egg scramble gently.

3. Wash pan. In the pan, add oil and cook chicken. Once done set aside.

4. Saute garlic. Place zucchini in the pan. Cook for 5 minutes. Put in scallions. Cook for 2 minutes.

5. Pour in the sauce. Mix with noodles and the meat. Add in the eggs.

6. Cook for 5 – 10 minutes.

7. Ready to be served.

8. Season with salt and pepper.

Thai Cuisine

This cuisine uses a mix of meats and seafood with vegetables. What types of spices are being used? /They use garlic, pepper, and fish sauce. Chinese introduce noodles to Thailand. Therefore, the dishes are either rice or noodles. Surprisingly, Thai food is influence by Indian curries. Curries, they have are slightly different they have red, yellow, and green curries. Other spices used are Thai holy basil, lemongrass, and Thai ginger.

Thai dish

Thai dishes are sweet, spicy and tangy. There a combination of meat and vegetable. Do try pad Thai with zucchini noodles.

If you want to eat healthier or build stronger immunity, do try bone broth.

Or, trying dishes with more vegetable cauliflower parmesan.

Gluten-free Meatballs

My dad makes Gluten-free Meatballs all the time. Our family tends to have Italian dishes quite often pizza, lasagna, and meatballs. I love the spinach feta cheese pizza my Dad use to make. And, I do enjoy the meatball he made in the past. Delicious meatball is juicy. The onion makes the meatball have a slightly sweet flavor. Sometimes we have meatball with spaghetti or a dish by itself with rice and vegetable. Do try this gluten-free meatball dish.

Gluten-free Meatballs Recipe

Gluten-free Meatballs

Ingredients:

1 egg

2 tbsp. olive oil

1 lb ground pork

1/2 cup of gluten-free bread crumb

1/2 cup of vegetable

1 cup onion

Instructions:

1. Preheat oven 350-degree Fahrenheit.

2. In a medium bowl, beat egg.

3. Separate bowl put in ground pork and bread crumbs.

4. Wear gloves. Mix the mixture with hands.

5. Add chopped spinach. Mix to combine.

6. With a baking tray, spray to prevent from sticking.

7. Shape the mixture into balls. Place on the baking tray.

8. Let it bake for 30 – 40 minutes.

9. Let it cool before eating.

Tips to make Meatball

When meatball has a high-fat content, it is very tender. Lean protein can be easily overcooked and dry out. By allowing the breadcrumbs to absorb some liquid before mixing the meat, it retains the water. Over mixing the meat mixture it can become tough. Be careful. Do cook all sides of the meatball before baking to keep the meatball juicy.

Meatball

Who can resist juicy meatballs? These can be frozen to be used later. Cook the meatball on all sides. Then, place it in a Ziploc bag to be used for later. These can be used in a crockpot and store in the freezer. Do try these juicy gluten-free meatballs.

If you like slow cooker meals, do try beef and broccoli.

I would love to try new recipes like a slow cooker pot roast.

Gluten-free Vegan Gingerbread Cookie

When I think of the Christmas holidays, I always think of gingerbread. Why do we think of ginger and spice? These dried ingredients like cinnamon and ginger do keep very well. Ginger is fantastic to hide other ingredients. In the olden days, to make gingerbread you would need potash to help it rise. Unfortunately, potash has an unpleasant taste. Ginger helps to cover the taste. Those who travel regularly the spices used to remind them of home. Therefore, every holiday we bake treats pass down to remember the good times. And, this helps to preserve the tradition. Why not gluten-free vegan gingerbread cookie.

Holiday Treat

I have never given my children gingerbread cookies. They always had shortbread or sugar cookies. This year, their school gave them gingerbread cookies as gifts. The first things my kids ate were the icing and sprinkles. Of course, they ate the buttons which are smarties next. Then, the gingerbread cookies. I wanted to try making a gluten-free vegan gingerbread cookie.

Gluten-free Vegan Gingerbread Cookie Recipe

Gluten-free Vegan Gingerbread Cookie

Ingredients:

1 1/4 cup of buckwheat flour

1 cup gluten-free oat flour

1/2 cup of coconut sugar

3 tbsp. coconut oil (melted)

4 tbsp. vegan butter

1 tsp gluten-free baking powder

2 tsp ground ginger

1/2 tsp ground cinnamon

salt and pepper

nutmeg (optional)

Instructions:

  1. Sieve the flour. Add in baking powder and mix together.
  2. Add in coconut oil and butter. Combine.
  3. Roll the batter into a ball. Take a plastic wrap to wrap the dough. Refrigerate for 30 minutes.
  4. After 30 minutes. Preheat the oven to 350 degrees Fahrenheit.
  5. Roll the dough on the counter. The dough should be 1 cm thick.
  6. Cut the gingerbread man shape with a mold. Use a spatula to gently move the cookie onto a baking sheet.
  7. Bake for 12-15 minutes.
  8. Let it cool.

Cookies

My daughter really likes gingerbread cookies. These cookies are healthy made from buckwheat and gluten-free oat flour. Buckwheat flour provides energy. These four have protein and fiber. Oat flour helps to lower cholesterol. Surprisingly, my daughter is not fond of spicy food. These treats had a slight ginger flavor at the end. And, they were filling treats. Do try these Gluten-free vegan gingerbread cookies.

Are you looking for a breakfast idea? how about these Banana bar chocolate chip treats.

The next thing I love to try is a breakfast item with more vegetable recipes.

Gluten-free Shortbread Cookies

This December, I wanted to give baked goods as part of a Christmas gift to others. When I think about the Christmas holiday, I think of treats: gingerbread, candy canes, shortbread cookies, etc. I love shortbread cookies. Shortbread cookies are always the first to come to my mind when I think of cookies. Shortbread cookies are high in butter; therefore, is both crumbly and tender. It is rich but very addictive. This year I am going to make gluten-free shortbread cookies.

About Shortbread

These treats are lovely. They originated in Scotland. Originally they were biscuits made from three simple ingredients white sugar, butter, and oat flour. Shortbread originated from a high percentage of butter recipe. Short is the term used when placed in both biscuits and pastries. It gives the meaning of crumbly. Therefore, this is how a shortening name came from.

Gluten-free Shortbread Cookies Recipe

Ingredients:

1-2 tbsp. maple syrup or honey

8 tbsp. coconut flour

1/2 tsp vanilla extract

4 tbsp. of butter or vegan butter

Instructions:

  1. Preheat the oven 350-degree Fahleite. Take out a baking pan. Spray pan with oil to prevent a cookie from sticking to the pan.
  2. In a small bowl, add butter and coconut flour. Blend with an electric mixer.
  3. Add maple syrup and vanilla to mixture. Mix well.
  4. Use a spoon to scoop batter on to the baking pan. Take a fork and press down.
  5. Bake for 8 – 10 minutes.
  6. Allow the cookie to slightly brown.
  7. Remove from the oven. Let it cool.
Gluten-free Short Bread Cookies

Gift

Homemade baked goods are always a lovely gift. If you have a long list to shop for, you want to stay on budget. Homemade items would help with the cost. Sometimes the cost can add up, if you need to buy for your children, significant other, siblings, parents, teachers, your children’s friends, etc. This is quite a list. Anyways, who can resist buttery shortbread cookies? Do consider making baked goods like these gluten-free shortbread cookies as gifts.

If you are turning to plant-based food, you might like my vegan egg post.

Or, I should try something different like a Snowmen meringue cookie.


Gluten-free Dairy-free Ice cream

Lately, the weather has been getting hotter. Summer is definitely here. To me, summer is all about cold dessert and delicious fresh fruits. My kids love their treats namely ice cream. They love flavors like vanilla, chocolate and strawberry flavors. I have been purchasing these dairy-free gluten-free ice cream treats regularly sometimes as a bribe or sometimes as a reward. Then, one day a thought came to me why don’t I get an ice cream maker to make cold dessert for the kids. I would be able to make gluten-free Dairy-free Ice cream treats regularly.

Dairy-free ice cream

I have tried two recipes my children seems to love Strawberry and vanilla gluten-free and dairy-free ice cream.

Gluten-free Dairy-free Ice cream
Vanilla ice cream

Dairy-free strawberry ice cream

Ingredient:

3 cup of strawberry (frozen or fresh)

1 (15oz) coconut milk full fat

1/3 cup honey

Equipment:

Ninja Chef Countertop blender with 1500 watt

Instructions:

  1. Add all the ingredients in the blender. Blend together.

Vegan Vanilla Ice cream

Ingredients:

1/2 cup medjool dates

2 can full fat coconut milk

1/2 tsp sea salt

2 tbsp. maple syrup

1 dash cinnamon

1 tbsp. vanilla

Gluten-free Dairy-free Ice cream
Strawberry Ice cream

Instructions:

  1. Put all the ingredients into a blender. Turn to ice cream setting on Ninja blender. Once the blender count down the amount of time require to make the ice cream.
  2. The ice cream is done.
  3. Place in the fridge to freeze.

Note: Need to take out the ice cream for 10-30minutes in room temperature or refridgerator to allow it to soften. Or, the ice cream will be very icy.

How to make ice cream fun:

-Add colorful sprinkles on top

-Crumble nuts or granola to add texture

-Get large gluten-free cookies to make it into ice cream sandwich

-Add some spice like cinnamon, nutmeg, clove and pumpkin spice

-Drizzle balsamic sauce on top of the vanilla ice cream

Dairy-free Gluten-free Brands

Luna and Larry’s Chocolate Hazelnut Frudge

So delicious Turtle trails

Treat

Ever since I was little, I will never get tired of ice cream. My husband find it funny I can have ice cream all year long. It looks like my daughter is the same. I love the different flavor for ice cream. You can always add something sprinkles or things to ice cream to make it fun.

Benefits of Vegan Ice cream

Choosing vegan ice cream, there are many benefits besides helping with the food allergies. Vegan ice cream will help with weight loss, less bloating, clear skin and help sinus issues. Did you know making the choice of choosing vegan will help with the environment? Animal products create lots of waste and are bad for the environment.

I would love to try a different flavor like making salted caramel ice cream.

If you would like to take at my smoothie recipe, please see here.

Gluten-free Dairy-free Egg-free Pizza

When I was little my dad owned a pizza restaurant, where I learn about American food. I had fond memories of the time I spend with my family, I was too little to help. I learned a little about restaurant life. And, I learned to make pizza and ribs.

Gluten-free Dairy-free Egg-free Pizza
pizza

I loved it when my dad prepares meals for me at the restaurant. It was delicious. We would be in the restaurant early and stay late to clean up. Making pizza crust, I never got tired of pizza. A Gluten-free Dairy-free Egg-free Pizza


Gluten-free Dairy-Free Egg-free Pizza Crust

Ingredient

1 tbsp honey

1 1/4 cup gluten-free flour

1 1/2 tsp yeast

3/4 tsp salt

2 tbsp olive oil

1 tsp baking powder

1 cup water

1 tbsp psyllium husk

Instruction:

  1. In a cup with warm water add yeast. Add honey. Mix well. Let the mixture sit for 10 minutes.
  2. In another bowl, add flour, salt, baking powder, and psyllium husk. Combine. Once combined, add yeast mixture.
  3. Then, add olive oil. Mix together. The batter would look like cookie dough.
  4. Take a cloth and cover the batter to let it rise. It should sit for 30 minutes.
  5. After 30 minutes, press dough into pizza pan. Let the dough rise for approximately 10 minutes.
  6. Turn the oven to 425 degree Fairinheight. Bake for 15-20 minutes. Remove from the oven.

Gluten-free Dairy-free Egg-free Pizza


Pizza Topping

Ingredients:

1 Pizza crust

175 g – 200 g ham

1/2 cup spinach

1/2 – 1 cup vegan cheese (cheddar or morzella)

Instructions:

  1. Take the pizza crust.
  2. Add spinach and ham all over the pizza.
  3. Spread the cheese all over the pizza.
  4. Turn oven at 375 degree Fairinheight. Place the pizza in the oven.
  5. Bake for 10-15minutes. After 15minutes. Let the pizza cool.

Comfort Food

I enjoy having a slice of pizza; a break from everyday food. Don’t you love comfort Food? Pizza has always been mine. You can add as many toppings or as much cheese as you would like. Free to do as I like.

Daughter’s Food Sensitivity

My daughter miss pizza the most after finding out her food sensitivity. She cannot have tomato, dairy, and gluten. Unfortunately, I haven’t found a sauce recipe to replace the tomato sauce. She enjoys the gluten-free dairy-free egg-free pizza.

Gluten-free Dairy-free Egg-free Pizza
ham and spinach pizza

Mom Goal

Being a mom is hard work, I believe seeing my daughter enjoy the dish. This is worth the sacrifice. Next, I would love to make crossiant.

You might like to try the butternut squash mac and cheese recipe

Do You Have Bathroom Issues

When I first become a parent, I learn it is very important to feed and watch for my child’s diaper. This points to the health of the baby. I try to get my daughter to drink more water for better digestion. However, this can be a little tricky to make plain water tasty to entice my little one. She does not understand how water by itself is quite refreshing. Char cannot have her wheat, this might have affected her digestion. Instead, I decided to try a different approach to better gut health. Do You Have Bathroom Issues?

Introducing gluten-free Fiber

New regime, new meal plan, this will improve issue with healthy digestion. A gluten-free fiber is known as psyllium husk. It is a laxative. What it does is to absorb the water in the gut and improve the bowel movement. Psyllium is a prebiotic, something that gives healthy probiotics to grow in the gut. Good bacteria in the digestion is very important for the immune system.

Do You Have Bathroom Issues
Psyllium husk

Child’s new regime

What I do the first thing in the morning is to make a cup of smoothie for my daughter. Then, I would add some psyllium husk in her smoothie. For either lunch or dinner, I can sprinkle a little in her dish. It is very important for her to have her water, so I would get her to have water with each of her meal. Also, the psyllium husk requires a good amount of water intake.

Peach and Raspberry Smoothie

Smoothie

Ingredients:

1/4 cup of fresh or frozen peach

1/4 cup of fresh or frozen raspberry

1 tbsp. of maple syrup

1/2-1 cup soy milk

1/2 cup coconut water

2 prune

pinch to 1/2 tsp psyllium husk

Instruction:

  1. Pour the liquid in a blender.
  2. Add all the fruits, maple syrup, and prunes.
  3. Blend the items together. If the items are not blending well or there is not enough liquid, add more liquid until everything blends together.
  4. Once everything is mix well. Pour into a glass. Sprinkle psyllium husk on top. Stir.
  5. Ready to enjoy.

Little One’s Approvable

The sweetness of the smoothie really had my daughter asking for more. The psyllium husk really helps with my child’s constipation. And, the smoothie helps with the liquid intake. You can add more coconut water to the smoothie for more water content. Do you have bathroom issues? Then, you try psyllium husk to see if it would help you. Let me know.

Next time I will try incorporating psyllium husk into a loaf of bread recipe.

Going not only Gluten-free, No egg, and No dairy

I recently took my daughter to a Naturopathic Doctor because the Allergist I saw didn’t help as much as I had hoped. Based on the result, my daughter didn’t react to any of the main items such as dairy, wheat, egg, and nut. However, she still reacts to something.

Going not only Gluten-free, No egg, and No dairy

Gluten-free

When I had suspected she was senstivitive to gluten, once I switch her to gluten-free her conditions would get better. Therefore I thought she had a gluten sensitivity. 

Recommendation

The Naturalpathic Doctor mentioned the highest food allergy is due to wheat, egg, and dairy. It would be best for Char to not eat the three items for three months. I know it would be challenging. The time I started on a gluten-free diet; it was extremely stressful. Now, I would need to eliminate three items. It would be tough. Hopefully, after I put Char on this strict diet, it would improve her condition. After the three weeks, the Doctor would be doing a blood draw to test her food sensitivity. 

Supplements

While Char will be on a strict diet, the Doctor recommended two supplements to improve my daughter’s gut health and development.

-OmegAvail Citrus Sorbet Smoothie helps to support optimum cognitive health and brain function(brain, eye and nerve developments)

-HMF Natogen Probiotic Formula

Gluten-Free Can Cause Nutritional Deficiencies

Gluten-Free Can Cause Nutritional DeficienciesWhat are some of the nutritional deficiencies?

If you are deciding to switch to gluten-free, it can cause nutritional deficiencies. The bread product with gluten provides a high amount of B vitamins. Unfortunately, gluten-free is not fortified with B vitamins. Women who are thinking of having children or who are pregnant should be more aware if they are on a gluten-free diet.


The Vitamins and Minerals Lacking from Gluten-free Diet

Vitamin B12

Thiamin

Riboflavin

Niacin

Vitamin B6

Iron

Vitamin D

Calcium

Concerned about Low Amount of Vitamins?

You can take a gluten-free vitamin to ensure you have a sufficient amount of vitamins and minerals.

Gluten-Free Can Cause Nutritional DeficienciesPrefer Vitamin and Mineral From Food

B6 – This vitamin fight against infection and help any all nerve function, move

Folate – Produce new cell, help prevent deformity in babies. Folate is in spinach, asparagus, brussel sprouts, broccoli, and peanut.

Vitamin D – Body produces vitamin D when in contact with the sun. The following items have vitamin D dairy, cereal,  and orange juice.

Calcium – Calcium is good for bones. It is in dairy, tofu, canned fish with bones and orange.

Iron – Iron is important for red blood cells. It moves oxygen around the body. Beef, turkey, oysters, tuna, soybean, and legumes.

Vitamin B 12 – this vitamin helps to fight against exhaustion. Vitamin B12 maintains nerve and blood cell health. What you can eat to increase the amount of vitamin B12 in your system is to consume meat, fish, and dairy.

Thiamin, riboflavin, niacin – these vitamins give off energy. They convert food to energy for the body. The items to increase the above vitamin are beans, lima bean, potato, acorn squash, meat, and almond.


When trying to eat a balanced diet, it might not be enough. It is difficult to consume enough to fulfil the required amount of vitamin levels needed so what you can do is to take a multi-vitamin.


Small Nutritious Bite Size Snacks

Small Nutritious Bite Size Snacks

My husband has been working really late due to crazy deadlines. He has been really exhausted and has been working lots of overtime. With the crazy deadlines, sometimes he doesn’t have a lot of time to eat. I wanted him to have with little hassle.  He needs something to keep him going. Something he can just pop in his mouth and is not messy. I found these small nutritious bite-size snacks for him.

Gluten-free Energy Bite

Benefit:

These bite-size snacks are pack with full of nutrient. It contains proteins, good fat, fiber, and good carbohydrate. It energizes and contains low Calories. The snack is easy to pack and is small in size. Some require baking and some don’t require baking. The snack does not require a lot of time to make. Extremely healthy made from the natural source of energy. The snack is portable. The nutrient allows slow release and longer affect with the ingredient and protein. It is not high in sugar so there is no sugar crash. Plant-based protein. The ingredient allows you to feel full and energized.

Should There be a Limit:

Energy ball is healthy but there should be a limit on the amount to have. Don’t overeat. You should have it in moderation.

When to have Energy Ball:

Energy ball can be consumed before and after a workout. If not exercising, you can consume these after breakfast and in between lunch and dinner.

What is the Energy Ball Good for?

This snack prevents from getting too hungry. There is no caffeine crash.

Recipe:

1 cup oatmeal (dry)

1/3 cup honey

1/2 cup peanut butter

1/2 cup dark chocolate chip

1 tsp vanilla extract

1 tbsp. chia seed

2/3 cup coconut flakes

1/4 cup chopped walnut

1/4 cup flax seed

Instruction:

  1. Mix all ingredients together.
  2. Refridgerate for 20mins.
  3. Use a spoon to scoop out.
  4. Roll the ingredients into a ball.

My husband and my kids love these small bite size snacks. They are delicious.

Small Nutritious Bite Size Snacks