Fresh Homemade Blackberry Juice

Fresh Homemade Blackberry Juice. Of course, my children love drinking juice it is sweet especially store-bought. Though, I do worry about the amount of sugar and the type of sugar being used to make the juice. Therefore, I try making fresh-squeezed orange juice to increase vitamin C in my children’s diet. Another juice great for the body is blackberry juice, especially homemade ones.

Fresh Homemade Blackberry Juice Recipe

Fresh Homemade Blackberry Juice

Ingredients:

2 box blackberry juice (170g each)
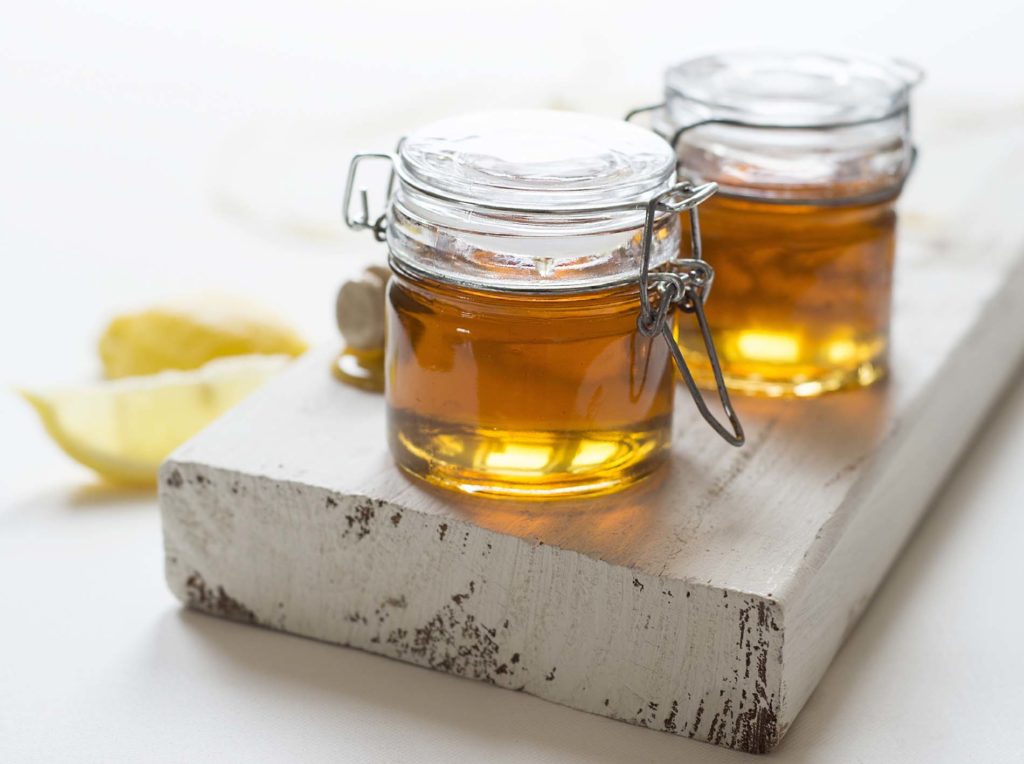
honey 1/4 cup

water 1 1/2 cup

Instructions:

  1. First, so and wash the blackberries. In a small pot, fill with water and blackberries. And then, turn on the stove on low.
  2. Furthermore, take a potato masher to mash the blackberries. Let it simmer for 10 minutes.
  3. Moreover, let the berries cool. Next, pour through the strainer. With a spatula press to squeeze the juice from the seed, pour the rest in the bowl.
  4. Finally, add 1/4 cup of honey more if you like the juice to be sweeter.
  5. Store in the fridge for later.
Fresh Homemade Blackberry Juice

The Benefit of Blackberry Juice

There is a lot of benefit from Blackberry or blackberry juice. As far as I know, blackberry contains vitamin C is essential for strong immunity. Additionally, this berry is high in fiber. Not only this, this fruit may help to improve the health of the brain. Also, Blackberry is good for oral health. The health of the mouth can affect a lot of things. As well, blackberry juice is good for eye health.

Do try this nutritious blackberry juice. If you enjoy homemade items, do try homemade sore muscle balm. I would love to try more homemade items homemade hand sanitizer.

Sweet Wrap Pinwheel Lunch

Sweet Wrap Pinwheel Lunch. I am always searching for new lunch ideas for my kids. Unfortunately, they get bored. And, sometimes I don’t have a lot of time. Therefore, I am always looking for simple, quick, and healthy lunch ideas. Thus, lunch with a balanced diet which contains carbohydrate, protein, and vegetable.

Crepe recipe

Ingredients:

3 eggs

2 1/3 tbsp butter

1 1/4 cup rice flour

1 cup non-dairy milk

Instructions:

  1. First, in a bowl add all the ingredients. Then, whisk together.
  2. Turn on the pan, add oil, and scoop batter onto the pan.
  3. Let the batter cook for 1-2 minutes. Next, flip the pancake.
  4. Transfer to a plate.

Sweet Wrap Pinwheel lunch recipe

Sweet Wrap Pinwheel Lunch

Ingredients:

2 tbsp peanut butter

1/2 – 1 banana (sliced)

5 – 10 toothpick

Instructions:

  1. First, place a crepe on a plate.
  2. Secondly, apply peanut butter to the crepe. Then, add slices of banana.
  3. Subsequently, roll the crepe. And then, do cut to 1 1/2 inches – 2 inches.
  4. Apply toothpick to prevent pinwheel from breaking apart.
Sweet Wrap Pinwheel Lunch

Pinwheel Ideas

There are several pinwheel lunch ideas to try. Above all, do try some pinwheel lunch ideas such as ham and cheese, turkey and cheese, tuna and mayo, cream cheese and cucumber, turkey, and avocado. Last but not least, these pinwheel lunches are fun ideas to have for a snack or school lunches.

Do try pinwheel lunches. If you enjoy gluten-free items, do try a gluten-free snack bar. I would love to try dishes like cauliflower curry.

Delicious Yogurt Drops

Delicious yogurt drops. Snacks can be a tricky matter. Then, I do some research to find something that inspires me or something my kids might be interested in. For instance, kids are like a guessing game. My daughter loves chocolate chips muffin and cocoa powder mix in it, but I would of never guess she mind the dark-colored muffin. You would never have known of your child’s reaction until you tried it.

Delicious Yogurt Drops

Delicious Yogurt Drops

Ingredients:

favored yogurt 1 – 2 cups of

piping bag or plastic bag 1

maple syrup 1 – 2 tbsp.

wax paper

Instructions

  1. Firstly, take a baking tray and place wax paper on it.
  2. Next, take a medium to a large bowl and add the following ingredients flavored yogurt, and maple syrup. Whisk.
  3. With a spoon, scoop the yogurt into the bag. If there are too many, leave the rest for later. Allow the bag to sit in a bowl and the freezer for 15 minutes. At this time, take the yogurt bag out of the freezer.
  4. Cut a hole in the corner of the bag.
  5. Then, squeeze drops of the yogurt onto the pan.
  6. They could be in the shape of a drop or whatever the cook would like. Children can have a lot of fun with this.
  7. Finally, after filling the whole tray with yogurt drops. Let it freeze for an hour. Once frozen, transfer the drops into a Ziploc bag.

2.

Delicious Yogurt Drops

Tips to Make Yogurt Drops

However, some like to use a bag to squeeze the yogurt out to the baking pan. Unfortunately, there is not as much control since bags do not stay up unless you take a tougher bag. But, Other ways to make it easier is to take a condiment bottle for less mess and perfect shaped drops. As a result, if anyone enjoys plain or just a simple flavor like vanilla, do use just white yogurt for the drops.

Fun Yogurt Drop

Moreover, for a fun yogurt drop, do add small chunks of fresh fruit for a little texture. For example, dice strawberries into small cubes. And then, dip the cube in the yogurt and place it on the baking tray for freezing.

Do try yogurt drops. If you enjoy baked goods, do try breakfast oatmeal cookie.

I would love to try new gluten-free recipes breakfast wraps.

High Protein Tortilla Chip

High Protein Tortilla Chip. Thus, a healthy fulfilling quick snack. Therefore, a high protein is made from almond flour with low carbohydrates. Besides, the chip can be full of nutrition by adding various ingredients such as flaxseed, chia, psyllium husk, or nutritional yeast. Besides, nutritional yeast is a high source of vitamin B 12 and is high in protein.

High Protein Tortilla Chip

High Protein Tortilla Chip

1 tbsp chia seed

1/4 cup water

1 cup almond flour

1 tbsp olive oil

1/4 tsp garlic powder

1 tsp nutritional yeast

1/4 tsp – less salt

Instructions:

  1. Turn on the heat 390 degrees F.
  2. Furthermore, with a small bowl, add in chia seed with water. Next, set aside.
  3. In a medium-size bowl, whisk to almond flour, olive oil, salt, garlic powder, and nutritional yeast.
  4. As well as Mix together and knead the dough. Do shape into a ball.
  5. Indeed, take two parchment papers. Place the dough in between two parchment paper. Take a rolling pin, roll out the dough until it is flat. Try to roll as thin as possible without breaking or tearing the dough.
  6. Also, use a round object, and place it on top, cut them around the object. Finally, cut circle into triangles.
  7. Therefore, transfer on to the baking tray. Bake for 6 minutes.
  8. Scoop the pieces with a spatula.
  9. let it cool.
Cheesy Macaroni Pasta

What goes well with Chips

  • guacamole dip
  • hummus dip
  • chili cheese dip
  • spinach dip
  • salsa and cheese

Tips on Making the Chips

As well, when making the batter, roll the tortilla dough thin to give a crispier chip. Moreover, for more texture chips should be cooked in the oven a little longer with golden brown color and a crispier taste. Certainly, before baking the chips brush on with olive oil or coconut oil to give the chip more color.

If you enjoy chip and dip, do try baked apple crisp.

I would love to try new dishes like a slow cooker shepherd’s pie.

Fun Bath Bombs

Fun Bath Bombs. Bath bombs are great. They help to soothe achy muscles. Give relaxation to help de-stress the mind with the help of essential oils like lavender or ylang-ylang. Bath bombs can be all shapes and sizes by using molds like seashells, hearts, or cupcakes. They can be big or small in size. These bath bombs are fun and colorful. They can be in pink, blue, or in multiple colors. Fun bath bombs are like a work of art.

Fun Bath Bombs Recipe

Fun Bath Bombs

Ingredients:

1 cup baking soda

1/2 cup of citric acid

1/2 cup Epsom salt

1/2 cup cornstarch

essential oil

1 1/2 tsp water

food coloring

Equipment:

measuring spoons

bath bomb molds

mixing bowl

stirring spoon

Instructions:

  1. In a bowl, add in baking soda, Epsom salt, and cornstarch. Mix.
  2. With a small bowl, add in wet ingredients essential oil, water, and food coloring. Stir.
  3. Then, combine the wet ingredients with the dry ingredients. Finally, slowly add in the citric acid. Whisk together. Note: the citric acid will fizz. This is normal. Try to not let ingredients not react too much.
  4. Scoop the mixture in the mold. It will be fine to overflow the mold with the mixture. Press the molds together. Let it sit for 10 minutes and tap to remove the mold. If the mixture falls apart, put it together, and try again. Let it sit a little longer and try again. Afterward, let the ball sit overnight.
Fun Bath Bombs
Fun Bath Bombs

The aroma of Bath Bombs

These lovely bath bombs can have an abundance of smells. They can be lavender, lemongrass, peppermint, green tea, chamomile, or cocoa butter. Also, these can be a work of art by adding lavender flowers, dried fruits, dried flowers, etc. People love bath bombs, which can bubble and fizz in the water. This creates a spa environment in your very own bathtub. Not only this, but they can also really benefit the skin.

Do try these fun bath bombs. If you do enjoy homemade products, do try homemade bubble bath or homemade exfoliant.

I would love to try more homemade detergent.

Mommy Health Remedies is a participant in the Amazon Services Associates Program. An affiliate advertising program designed to allow sites to earn advertising fees by advertising and linking to amazon.com.

Honey Lavender Exfoliation

Honey lavender exfoliation. Its summer. This year the weather has not been as hot as in previous years. The plants are not growing as quickly. However, summer can still be very drying for the skin. An exfoliant would be very good for dry skin.

Honey Lavender Exfoliation Body scrub recipe

Honey Lavender Exfoliation

Ingredients:

honey 2bsp

lavender oil 7 drops

vitamin E 1 tsp

coconut oil 1 tbsp.

sugar 1 cup

Instructions:

  1. In a medium-size bowl, add in the sugar.
  2. Pour in the coconut oil and vitamin E oil. Mix.
  3. Then, add in the honey. Stir to combine.
  4. Drop-in lavender essential oil into the mixture. Do mix well.
  5. Store in a glass jar until needed.
Honey Lavender Exfoliation

Scrub

Depending on the ingredients, it is important to use healthy ingredients on the body. The skin absorbs what is sitting on the surface of the skin. Therefore, it is important to take care of the skin and use natural ingredients.

If you enjoy natural remedies or DIY, you can try a natural homemade bubble bath for yourself or your child. I would love to try more natural home remedies like a soothing face mask.

If you would like to stay organized, you might want to take a look at momAgendas

Soft Gluten-free Dinner Roll

Dinner Roll. My kids are little and they can’t eat as much as adults. Dinner rolls would be a good breakfast option for children. They can be made into mini sandwiches. Great for little fingers and easier for them to hold them. Small enough to have a balanced meal with carbohydrates, vegetables, and cheese.

Soft Gluten-free Dinner Roll Recipe

Soft Gluten-free Dinner Roll

Ingredients

  • 7oz gluten-free flour

  • 4.5oz almond flour

  • 1/2 tsp xanthan gum

  • 2 tsp instant yeast

  • 1 tsp salt

  • 1/8 cup sugar

  • 2 tbsp. butter

  • 1 egg

  • 1 tsp apple cider

  • 1 cup warm milk (105 – 110 degrees)

Directions

  • Warm one cup of milk. The temperature of the liquid should be between 105 – 110 degrees. Set the timer for 10 minutes.
  • In a large bowl, add gluten-free flour, almond flour, xanthan gum, salt, and sugar.
  • Once the yeast is ready, pour in the yeast into the flour mixture. Mix.
  • With another bowl, warm butter, egg, apple cider vinegar, and 2 tsp of water. Stir.
  • Pour in the egg mixture with the flour mixture. Combine. There should be no clumps.
  • Take a cake pan, brush oil on it.
  • Furthermore, separate dough to an equal amount. Place the ball in a cake pan with one in the middle. Turn the oven to 200 degrees for proofing. After 30 seconds, turn off the oven. Wrap plastic wrap on the top and a warm towel on top.
  • Place pan in the oven for 35 – 45 minutes. Once done. Remove from the oven. Preheat the oven at 375 degrees. Remove the towel and plastic on the top.
  • Let the oven bake for 30 minutes.
  • Once done, allow the bake goods to cool.
Soft Gluten-free Dinner Roll

Mini Sandwich Ideas

  • Ham and cheese sandwich
  • Pull pork
  • Pepperoni with cheese
  • Ham, pepperoni, salami, and cheese

Baking Tips

When baking to raise the dough, you can rise the dough by using the oven to proof the dough. Another important thing to keep in mind, the warm liquid to activate the chemical in the yeast is very important. It should not be super hot. Therefore, do have liquid warmed up. Yeast should bubble.

Do try Soft Gluten-free Dinner Roll. If you enjoy baked goods, do try gluten-free cookies. I would love to bake more delicious gluten-free bake goods like gluten-free sweet potato hash.

Beef broth pho

Beef broth pho. Weekly, we tend to have pho a Vietnamese noodle soup dish. The rich beef bone broth with strong meaty flavor made with a combination of Vietnamese spices. Pho is a fantastic gluten-free dish that uses rice noodles. A dish to have on a cold day. Noodle soup is a wonderful comfort food item.

Pho process

The noodle soup broth is made by cooking beef bones for many days. This allows the broth to have a strong flavor. Originally, the broth was just a simple dish made by cooking the bone broth. Later on, the broth improved by adding spices to improve in flavor. Spices used in the broth are basil, cilantro, etc. They can be different depending on the area.

Beef broth pho recipe

Beef broth pho

Ingredients

  • 1 – 2 lb short ribs

  • 4 oxtail

  • 4 bone marrow

  • 1 – 2 lb beef shank

  • 1 whole star anise

  • 1 stick of cinnamon

  • 6 pods of cardamons

  • 3 scallions

  • 1 whole nutmeg

  • 5 whole cloves

  • 5 – 10 oz of rice noodles

  • bunch of soybean sprouts

  • 10 scallions

  • 1/2 bunch of mint

  • 1/2 bunch of cilantro

  • 1/2 bunch Thai basil

  • 1 – 2lb thin sirloin steak meat

Directions

  • First cook the spices. In a frying pan, add in star anise, nutmeg, cinnamon, clove, and cardamom. This will bring out the aroma.
  • Place the spices in a bag for the soup.
  • Take the crockpot, put in scallions, bone marrows, oxtail, short rib, shank, and spice ball.
  • Pour in water to completely cover the ingredients.
  • Cook low 6 – 8 hours.
  • Once the soup is done. Use a strainer to separate the liquid from the content.
  • Bowl of soup:
  • In a small pot, pour in beef stock.
  • Once boiled add in rice noodle. Noodle should take 5 – 7 minutes. Once tender add in bean sprout and the thinly sliced meat. It should take 5 minutes.
  • Should be ready to serve.
Beef broth pho
Beef broth pho

Broth to Boost Immunity

Hearty broths are not only tasty but good for immunity. By adding lots of vegetables, the soup is full of healthy nutrition and bone broth. Bone broth is full of nutrients. There are numerous vitamins, calcium, magnesium, and phosphorous. The broth allows the body to absorb the cartilage since it has been brewing in the soup for long periods of time. Also, the broth allows the body to take in collagen. This broth is very good for the body.

Do try Beef broth pho. If you enjoy crockpot dishes do try a crockpot chicken and carb. I would love to try more crockpot dishes like crockpot Indian spiced chicken.

Sweet bread with chocolate chip

A sweet bread with chocolate chip. An easy breakfast item I love-making. A quick simple recipe. The natural ripe banana makes the banana bread sweeter. Therefore, this recipe does not require a lot of sugar. Once the more ripe the banana, the tastier the banana loaf. I added two banana but the recipe can have 4 ripe bananas. Ripe bananas make the loaf moist and delicious.

Sweet Bread with Chocolate chip recipe

Ingredients:

Dry ingredients:

1 3/4 cup of gluten-free all-purpose flour

1 1/2 tsp baking powder

1/2 tsp kosher salt

1 tsp xantham gum

1/2 tsp baking soda

1/3 brown sugar

wet ingredients:

2 egg(room temperature)

6 tbsp. unsalted butter (room temperature)

2 banana (ripe)

topping:

1/4 cup dark chocolate chip

Sweet bread with chocolate chip

Instructions:

1. Preheat oven to 350 degrees Falhrent. Spray loaf pan.

2. With a bowl, mash banana with a fork.

3. In a large bowl, add in dry ingredients flour, baking powder, kosher salt, xanthan gum, baking soda, and brown sugar. Combine the ingredients.

4. Add the mashed banana to the dry ingredients. Whisk together.

5. The dry ingredients mixture makes a whole in the middle. Pour the wet ingredients in the middle. Mix.

6. Take the loaf baking pan, pour 1/2 of the batter, or a large part of the batter into the pan. Sprinkle the chocolate chip on the top. Then pour the rest of the batter. Add more chocolate chips. Gently, press the chocolate chip into the batter. Place the pan in the oven.

7. Bake for 30 minutes. Check when the baking time reaches 20 minutes to prevent burning.

8. Allow cooling before slicing the loaf.

Tasty Loaf

To make the loaf extra tasty, do try adding other dried fruits like cranberry or blueberries. For a more moist bread, add olive oil to the batter. The oil adds more moisture to the batter.

Do try Sweetbread with chocolate chip. If you enjoy baked goods, how about a gluten-free scone.

I would love to try new gluten-free bake goods like gluten-free hot cross buns.

Slow cooker beef and broccoli

Slow cooker beef and broccoli. My family is Asian. I do tend to cook more often Asian dishes. Beef and broccoli are what people are familiar with when people think of Chinese food. Who doesn’t like beef and broccoli, which is a saucy dish? The beef is tender. This dish goes very well with rice. The sauce makes people want to get extra servings of rice. Beef and broccoli give a sweet and slightly salty flavor to the dish. And when you make this at home, it is less oily. People love the gravy from slow cooker beef and broccoli dish.

Slow cooker beef and broccoli Recipe

Slow cooker beef and broccoli

Ingredients:

1 – 2 lb beef blade steak(cut into 1/4 inches in a slice)

1/4 cup of gluten-free soya sauce

2 tbsp. brown sugar

1 – 2 slice of ginger

1 tbsp. olive oil

1 – 2 cup of broccoli(chopped)

2 onions medium size (cut into slices)

1 – 2 tbsp. cornstarch

Instructions:

1. Take the steak. Slice into thin strips slices 1/4 inches of the steak. The cut should be made against the grain of the beef. Put aside.

2. Soak the broccoli. In a bowl, add soya sauce, brown sugar, and oil. Stir.

3. After the vegetables are done soaking, cut the florets into smaller chunks.

4. Place the broccoli on the bottom of the crockpot. Then, add the sliced meat on the top.

5. Pour the sauce all over the meat and broccoli. Add ginger. Pour 1/4 cup of the water into the crockpot.

6. Turn on the crockpot for 1 1/2 hour to 2 hours. Check to see if the broccoli and beef are cooked. Note: Do not overcook the beef or it will be tough.

7. Once finished. In a small bowl, add hot water with 2tbsp of cornstarch. Stir until it dissolves. Pour in the crockpot. Allow it to cook for 1 /2 hours.

8. Enjoy!

About slow cooker Beef and Broccoli

Homemade beef and broccoli are easy and healthy. This can be made in the comfort of your own home. No need to choose to take out. Beef and broccoli can be frozen or store in the freezer. The dish can be used as a freezer dump meal to save time. If you want to have tender beef, marinade with pineapple to have tender beef. How to choose the meat for the dish. Flat iron steak would be a good choice. This choice of meat would be a very tender choice of meat. My children love the saucy dish. Do try slow cooker beef and broccoli.

If you like crockpot meals, how about crockpot sweet Dijon chicken meal.

I would love to try more gluten-free snack ideas for children fish crackers.

Banana Yogurt Smoothie

Banana Yogurt Smoothie kids love. My children love yogurt beverage. They enjoy the fruity flavor of the sweetness from very ripe bananas. The creaminess of the Olympic organic yogurt. The honey makes the smoothie a little sweet but not too sugary. My children love the Banana yogurt smoothie.

Banana Yogurt Smoothie Recipe

Banana Yogurt Smoothie

Ingredients:

2 fresh or frozen bananas

1 cup of mango

1/2 cup yogurt

1/4 cup milk

1 tbsp. honey

1/2 tsp vanilla extract

Instructions:

  1. In the blender, add in the banana, yogurt, milk, and honey.
  2. Blend the items.
  3. The beverage will be smooth and creamy.
  4. Enjoy!
Banana Yogurt Smoothie

Probiotic

Probiotics are very important for our health. These are very important for those who have food sensitivity or eczema. Good bacteria will help with these issues and make the gut stronger. Restoring gut health, this will help to reduce itchy skin. And this allows the body to heal.

Feel Fuller with Meal

  • Do add organic gluten-free oats
  • Include nut butter

Things to Know for Better Health

Useful tips:

  • If there is more fat in the yogurt, the yogurt will be thicker, richer, and smoother
  • Avoid cream on top of the smoothie
  • Choose greek yogurt for more protein
  • With juice that is sweetened go for all-natural instead
  • No chocolate syrup or processed items
  • Natural fruit with no added sugar
  • Do not use brown sugar, molasses, and cane syrup
  • Try a natural approach like honey, agave, and real maple syrup

Children and Smoothie

My kids love the smoothie you know when I had to make more every other day. I spend a little of my time to give a healthier beverage it is worth it. Do try banana yogurt smoothie.


If you enjoy a warm bowl of soup, do take a look at my tomato, carrot, and potatoes soup recipe.

I love creamy hardy soups like creamy potatoes soup.

Day 6 Multi-task Jogger

Day 4 Multi-task Jogger

I am feeling much better with more exercise. Being a Mom, I treasure the time I have, which is very valuable to me. I try to make the best with the time I have. I need to use my time wisely. There are times where I would do multiple things together. I like to multi-task what about my day 6 challenge multi-task jogger.

Workout Daily

Now, I try my best to get some exercise to a certain amount every day. When I have very little time, I would try to multi-task. After dropping the kids to school, I have some time before picking my youngest. What I do to set my timer for 20 minutes. Then, I jog on the spot, while doing some tasks around the house. I jog while putting away dishes from the dishwasher. And I would continue this until all the dishes are in the proper places. This might seem silly but you get two things done at the same time.

Workout at Home

When I am done with the task if I still have some I time I would jog around my place and up the stairs. Along the way, I would pick up toys lying around. Put away clothes that fell off the chair. Tidy anything that looks out of place. Fold clothes. Stack kid’s books. This makes exercise less boring since you are focused on something else. And time goes by more quickly.

Day 4 Multi-task Jogger

Jog Around the Block

I enjoy jogging outside. It helps to de-stress. Might be due to the sweating removing toxins from the body. The trees and plans are refreshing and calming. The cold air in the fall feels very good. Feels good to give my body a good workout. This helps to clear my mind. I do enjoy it. Do try something that works for you like a day 6 Multi-task Jogger.

Please take a look at my first post regarding my exercise challenge.

And if you would like to read more articles on how to challenge yourself with exercise, do take a look at this.

Quick Convenient Vegan Eggs

Quick Convenient Vegan Eggs

When my little girl had to eliminate eggs. I was looking at different options I was confused and clueless. I didn’t know much about gluten-free, dairy-free, nor egg-free. Extremely stressed. Desperate. Hoping for a simple option. I went to a supermarket to see if something comes in a box or a jar. I didn’t find much. Then, I went to wholefoods. Hoping they have something there. In the fridge, close to the egg session, I found a carton. On the carton is the label Earth Island Vegan Egg. This might be a quick convenient vegan egg. It is a little more costly, but my daughter just wants a small number of eggs; It will be fine just a small amount occasionally. Quick Convenient Vegan Eggs

About Earth Island Vegan Egg

When I got home, I opened the carton. In the carton, there is a bag. The bag provides instructions. The basic instructions are to open the bag. Scoop two- level tbsp. of Vegan Egg in the bag. Add 1/2 cup of ice-cold water. Whisk quickly. This amount equals one egg. Tip to add salt and pepper. If you want more egg flavor, add black salt.

After trying the Recipe

After I tried cooking the eggs in the frying pan. I was indeed surprised the product did resemble and taste like eggs. This was a quick convenient Vegan Egg option for someone with little time. Or, for someone who does not do a lot of cooking and loves their eggs.

Organic soymilk powder (organic soybeans), modified cellulose gellan gum, cellulose, calcium lactate (plant source), Carrageenan, Natural flavors (contains black salt [contains black salt [black salt, Herbs]), Nutritional yeast, black salt, beta carotene for color

Moms

Quick Convenient Vegan Egg is a wonderful option for Moms with very little time. Vegan Egg helps to save time. Also, you can change the egg up by adding the different sauce. You like something spicy or some sweet with ketchup. Or, make it in to scramble eggs with onion, chopped red peppers, and sliced mushrooms. On the backside of the bag, there is a recipe for classic French toast. This might be interesting. I love French toast.

Do try quick convenient vegan eggs if you have very little time to spend cooking. If you have more time you can make vegan eggs from scratch, please take a look at my other post.

I would love to try more vegan curry dishes like this one. Maybe the next dishes to try are curry lentil dishes.

Natural treatments to sooth skin conditions like eczema

You can stop eczema flare-ups by changing your diet and using various natural products .Natural remedies can help prevent inflammation. What to use for natural remedies for the skin and to fight against any bacteria. Natural treatments to soothe skin conditions like eczema.

Natural items to help with eczema

Apple cider vinegar helps with eczema. Be careful, the acid from the vinegar can be too strong for the skin. To prevent this, reduce the acid level by mixing the vinegar with water. Human skin tends to be acidic. When the acid level of the skin is affected, the defense system is affected.

Colloidal oatmeal

colloidalWhat is colloidal oatmeal? This is taken from grounding the cooked oats. Oats help to prevent anti-inflammation. Also, colloidal oa reduce skin’s dryness, scalely skin, roughness and itchiness.

How to use colloidal oatmeal:

This can be used in a warm bath. Allow the skin to soak in the water.

Coconut oil

The fatty acid in coconut oil is good for dry skin. What it does is to help to fight against inflammation by strengthening the protective layer.

How to use coconut oil:

It is most effective to apply on the affected area after a bath.

Honey

This item has anti-bacterial and anti-inflammatory properties. What honey can be used for is to heal wounds. The sugary product is good to strengthen the immune system. Therefore, honey and lemon are wonderful for a sore throat or a cold. Honey can be used for burns.

What to do with this product:

This can be applied to area of the skin with eczema. This natural product will hydrate and protect skin from any infection.

What to beware of?

Need to be careful with soap for every day baths. Soap can be quite tough on the skin. Soap is alkaline while the skin has an acid base. It is best to use a more natural soap. Or, soap that is gentle on the skin or are fragrance-free. Avoid anything with harsh chemicals.

Things to do at home to help with eczema

  • Being dress too warm can irritate the skin allow loose clothing
  • Apply moisturizer like an oil on the area after a bath and apply a layer of Vaseline on top to trap moisture
  • Do consider omega 3 fatty acid supplements to help the hydration
  • eczema can be affected by food sensitivity you might try staying away food products like dairy, citrus, nuts, spice or tomatoes

My daughter’s food sensitivity journey.

If you want to read more about eczema, please take a look at this site.

Gluten-Free Bread for Breakfast

Gluten-Free Bread for Breakfast

I have been attempting to make a loaf of bread. I love the aroma of freshly baked bread. Imagine, the things you can make with a loaf of bread. Grill cheese, BLT, and peanut butter sandwich. When I first found out my daughter was sensitive to gluten; I wanted to learn to make a loaf of bread.

Issues with Gluten-free Baking

The very first time I made gluten-free bread, it felt like I was eating a loaf of brick. I might be exaggerating but it was definitely not airy. Not like what I had before. There were a lot of things my daughter cannot have so I want her to have her favorite peanut butter on toast. I know she loves her carbohydrates, which gluten sensitivity difficult for my daughter. I looked everywhere and I tried some recipes I finally found a very tasty one.

Gluten-free Loaf Recipe

Gluten-free flour blend:

1 1/3 cup brown rice flour                       1 1/3 cup tapioca flour

1 1/4 cup cornstarch                                 1 tbsp potato flour

Instruction:

  1. Mix all the flour in a large bowl.

Bread Recipe

Ingredient:

gluten-free flour blend                             1tbsp xantham gum

1 tbsp applesauce                                       2 tsp salt

1/2 cup milk                                                3 large eggs (room temperature)

1/4 cup butter(room temperature)         2 tsp apple cider vinegar(room temperature)

1/3 cup honey                                              2   1/4 tsp active dry yeast

2 cup warm water

Instructions:

  1. You would need 2 pan loaf of 8-inch bread pan. Spray pan to prevent the bread from sticking.
  2. In a large bowl, put in active yeast in 2 cups of warm water. Mix well. Let it sit.
  3. In another bowl, add gluten-free flour blend mixed earlier. Then, add the following xantham gum, applesauce, salt, and milk. Mix together.
  4. In another bowl, mix together eggs, vinegar, and honey. Pour into the dry ingredient a little at a time. Mix together.
  5. Put blender on low speed. Slowly add in the yeast into the mixture. Then, mix on medium speed. After everything is mix together.
  6. Pour the batter into the pans. Smooth the top of the dough with a wet spatula for a smoother appearance.
  7. Put a shower cap to cover the top of the bread pan to let the dough rise. Allow the dough to rise for one hour. Pre-heat the oven at 375 degrees.
  8. Afterward, place the pan in the middle rack. Bake for 50-55minute. Note: you can use the toothpick test to see if the loaf is ready. If you stick the toothpick into the loaf, the dough does not stick to the toothpick. The bread is ready.

This bread recipe is very different from the ones I had tried, it did not crumble. The bread have a springy texture. My daughter loves having this with her peanut butter spread on top. I glad she is able to enjoy her toast.

Smoothie with more Veggie

Kids fight to avoid eating their vegetables. They just seem to hate vegetables. Why? It seems that this could be due to the kids super sensitive taste buds. Apparently, kids taste the bitterness in the vegetables much more easily than adults. Therefore, children might not be as fond of having vegetables due to the taste. We Parents have to try kids need to have a balanced diet and without vegetable Parents worried there would be a negative effect on the child’s health. Over time my daughter has gotten a little better with vegetables but she is still quite picky with her vegetables. I tried making different meals or appetizers with increasing amount of vegetable. I tried to cook the vegetables differently make it differently or more tasty. Sometimes my kids like what I did with the vegetable but not all the time. I think the next best option is to make a smoothie which might hide the vegetable in the smoothie. My kids love fruits; it is sweet and juicy. Smoothie is a good option. Smoothie will blend everything together so my kids can take in all the nutrient from both the fruit and the vegetables. Also, the fruit might hide the vegetable or mask it.

apple
Smoothie with more vegetable

Spinach Smoothie

1/2 cup spinach

1 avocado

1 large pear (cut into slices)

1 banana

1 cup orange juice

1 apple (sliced)

Instruction:

  1. Put banana, avocado, pear, and spinach in the blender. Add orange juice.
  2. Juice the apple.
  3. Blend everything together.

Smoothies are great for kids. It will help to give a balanced nutrition. It is an easy way for the kids to get the vitamins and minerals they don’t get from their daily meals. Or, when the kids get picky with their food. By juicing, it is a quick way for the body to absorb the nutrient and build a stronger immunity. Also, juicing helps to release a digestive enzyme in the fruit and vegetable that does not happen when you eat fruit or vegetable with from chewing. This helps to improve the digestive tract and gives phytonutrients to the body.