Zucchini Vegetable Chip Snacks

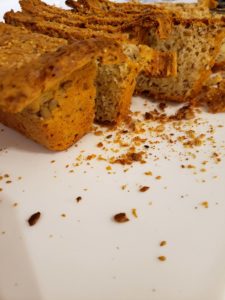
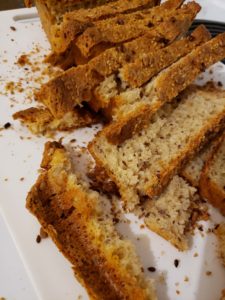
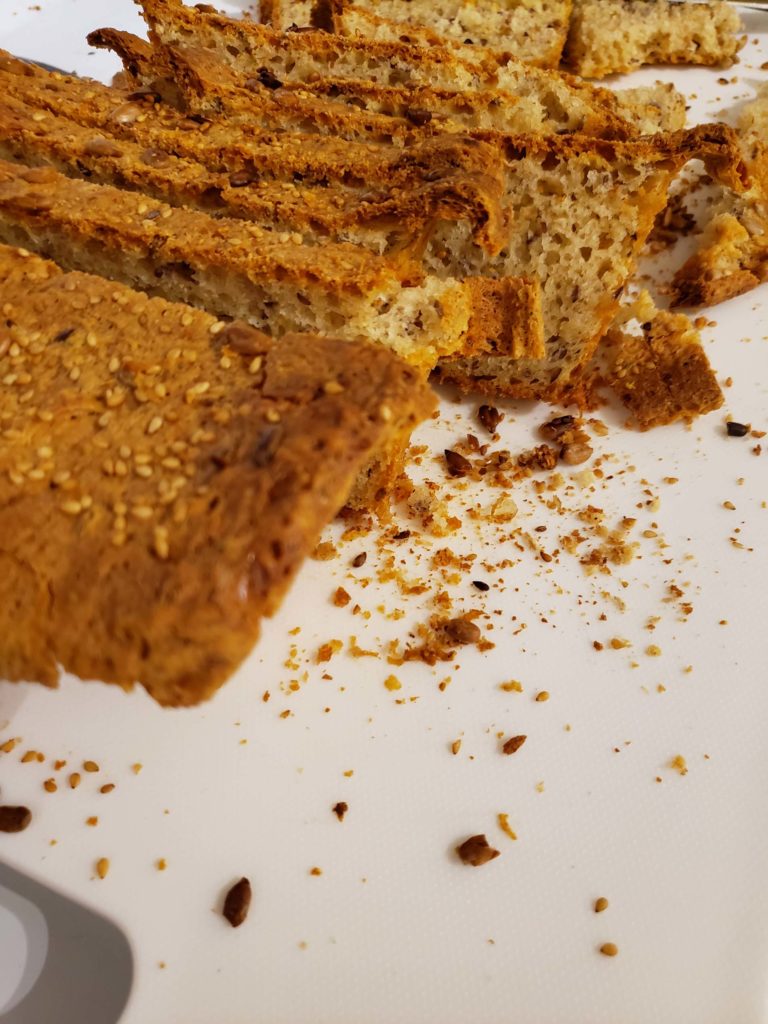
Zucchini Vegetable Chip Snacks. This week I want to increase more vegetables in our diet. Last week, I was increasing more fruit or probiotics to their diet. My children love to snack why not vegetable chips. Who can resist the crunchy texture? Something easy and simple for an after school snack. A dish that requires 2 – 3 ingredients. Delicious nutritious zucchini chips snacks.

Zucchini Vegetable Chips Snacks Recipe

Zucchini Vegetable Chip Snacks
Zucchini with seasoning
Zucchini Vegetable Chip Snacks
Zucchini with bread crumbs
Zucchini Vegetable Chip Snacks
cooked zucchini chips

Ingredients:

2 – 3 zucchini (medium to large)

1 tbsp. Italian season

1 – 2 tbsp olive oil

1 /2 cup gluten-free bread crumbs

salt and pepper

Instructions:

1. Preheat the oven to 375 degrees. Wash the zucchini. Cut the ends of the vegetables. Slice the zucchini into 1/2 inches.

2. Spray on a baking tray. Place slices of zucchini on a baking tray with spaces in between each other.

3. Take a brush to apply on oil on both sides of the zucchini.

4. Sprinkle Italian seasoning on all slices or with salt and pepper. Then, add gluten-free bread crumbs.

5. Place the tray in oven. Cook for 5 – 10 minutes. Flip onto the other side. Allow the zucchini to cook for another 5 – 10 minutes. With the thinner slices will cook faster or will easily burn. Do check often. Once done.

6. Let the chip cool.

7. Chips can be eaten alone or dip in ranch dressing.

What Chip Goes With

The chips can add texture to a sandwich. Or, eaten alone with a drizzle of melty cheese on the top. And, if you like a kick in the food, add in paprika. Sprinkle some parmesan cheese for more flavor. Crumble the zucchini chip to add on the top of a bowl of a creamy soup. Do try Zucchini Vegetable Chip Snacks.

Dip

  • garlic and herb
  • hummus
  • lentil dip
  • avocado dip

Do try zucchini vegetable chip snacks, they are a wonderful way to add more vegetable to your diet.

If you enjoy a simple meal, do try crockpot dijon chicken. I would like to try dishes like Crockpot Italian chicken pasta.

This post may contain affiliate links to provide for the site to earn advertising fees.

Learn about Amazon.

Parmesan Spinach Quiche

Parmesan Spinach Quiche. I enjoy a good gluten-free bite-size snack. A snack where I can finish in a couple of bites. Something easy and convenient. A healthy snack is high in protein, dairy, and vegetables. A delicious snack to fuel the body. Lovely parmesan spinach quiche is good for a snack or breakfast.

Parmesan Spinach Quiche

Parmesan Spinach Quiche

Ingredients:

6 eggs

1/4 cup parmesan cheese

1/4 cup spinach (shredded)

1 green onion

optional: shredded marble cheese or cheddar cheese

salt and pepper

Instructions:

1. In a muffin pan, spray muffin pan.

2. Crack and put one egg in each muffin tin.

3. Add shred of spinach in each.

4. Wash and cut green onion.

5. Put a little in each one.

6. Sprinkle parmesan in each tin.

7. Take a fork and mix.

8. Season with salt and pepper. Stir.

9. Bake for 20 minutes.

10. Allow the quiche to cool.

11. These can be frozen and used for later.

Combination

  • cheese and mushroom
  • feta cheese with spinach
  • cheddar cheese and broccoli
  • salmon
  • onion and sausage
  • bacon and sausage

Goes well with Quiche

  • Tomato soup
  • Vegetable soup
  • Fruit salad
  • Vegetable salad
Parmesan Spinach Quiche

Things to do with Eggshells

  • In the garden, if your garden tends to get slugs or soft-shelled insects. Spread eggshells on the area to prevent the insects from visiting the same area and eating your plants
  • Eggshells give the garden calcium to grow better plants
  • The shell can be used to plant seedlings
  • These shells can be used as compost
  • It can be used to scrub pots
  • Or, add in the crockpot to make chicken, beef or pork stock

Quiche

Quiche is a lovely snack. Do try to make parmesan spinach quiche for a healthier snack. A convenient snack or a simple dinner option. Let me know what quiche combination you like or what works for you.

If you enjoy a bowl of soup, do consider cabbage roll soup.

I would love to attempt more interesting breakfast options.

Creamy Tomato Soup

Creamy Tomato Soup

This week I am making creamy tomato soup. There are a lot of options with soup. Soup can be thick, creamy, chunky, and liquid with solids. Today there are many terms you hear often with soup for example bisque, chowder, stock or broth, bouillon, and consommé. You have a choice of different meats seafood, chicken, pork or beef bone to add more flavor. Choices of liquids to add for thickness or smoothness with dairy, non-dairy, cream, and cheese to give the creamy element.

Certain spices can remind people of a different culture. If by adding chili powder, they can give it a kick. Fantastic for cold weather. Soups are wonderful to keep you hydrated during cold winter weather. In the olden days, pots are not as strong they cannot handle the heat. With the past, soups were cooked by adding hot stones to cook the soup. The importance of soup is the cooking process to take out all the nutrients from the protein and vegetables.

Creamy Tomato Soup

Ingredients:

2 tbsp. vegan butter

1 onion(diced)

2 clove of garlic

4 cup of tomato

1/4 tsp baking soda

1 tsp parsley

1 large bay leaf

1/4 tsp salt

1 tbsp. basil

2 tsp honey

salt and pepper

Instructions:

  1. In a medium pot, turn on the stove to allow vegan butter to melt.
  2. Chop and peel onions. Dice onions. Mince the garlic.
  3. Add garlic in the pan, saute the garlic and add in the onions. Cook and stir to combine.
  4. Place tomatoes, broth, baking soda, parsley, and bay leaves. Let it cool. Once boiled. Lower the heat.
  5. Remove the large herb such as bay leaves. Allow it to cool and puree the soup.
  6. Can add gluten-free crouton on the top of the soup. I like to stir in a little of the non-dairy milk to make it creamy.
  7. Enjoy!

What to Add to Soup

  • fresh diced tomato on top
  • pesto on top
  • saute bacon and onion on top
  • chunks of chicken with spinach
  • fresh basil on top

The benefit of Tomato Soup

Creamy tomato soup is a wonderful simple nutritional soup to have weekly. Tomato has a large amount of lycopene, which is good for inflammations. You can make a quick lunch grill cheese with creamy tomato soup. What can you have with tomato soup? You can have soup with mozzarella stick, avocado salad or with BLT. Tomato soup can be stored in the freezer. If you want to freeze the soup, do not add dairy products in it until you want to have the soup. It can be stored for 6 months.

If you are always looking at a screen, do have soup to help with your eyes nice and strong. What I should try are Asian gluten-free meal ideas.

Christmas Cookie Treats

This year, my goal is to try different Christmas cookie recipes. I love the challenge. My children love to help with the baking. They have lots of fun choosing different cookie cutters and shaping the cookie dough. My children love playdough. Cookie dough is similar to playdough, especially to my son. They love being little helpers. Whenever I am cooking, my daughter and son love to help me by flipping food in a pan. It’s adorable. This time I made these delicious buttery Christmas cookie treats to share with friends.


Christmas Cookie Treats

Ingredients:

3/4 cup or 12 tbsp. butter (room temperature)

1/2 cup cornstarch

1/4 tsp salt

1/2 cup powder sugar

1 tsp vanilla

1 cup all-purpose flour

Christmas Cookie Treats

Instructions:

  1. Turn on the oven to 350 degrees Fahrenheit.
  2. In a bowl, put in the butter. Blend until creamy. Add sugar, cornstarch, and vanilla. Combine.
  3. Add salt and flour. Mix to combine. The batter should stick together.
  4. Spray baking tray. Use a spoon to scoop dough onto the tray or take a small ball of dough. Roll into a ball. Flatten with hand.
  5. Put the tray in the oven. Bake for 8-10 minutes at 350 degrees Fahrenheit. Bake until slightly brown until set. Don’t over bake.
  6. When the 10 minutes is up, take out of the oven. Allow the cookies to cool.

Christmas Celebration

Children make you excited for Christmas time. And the family tradition you develop with your family. During Christmas, we always set aside some time to have a family photo with Santa. Looking back at the Santa photos from the previous years, it is amazing how much the children have grown and how different they look. I love looking at my kids’ photos. And in the evening, we would take the children in our neighborhood to look at Christmas lights. I love these traditions.

My Christmas Tradition

I enjoy watching Christmas movies at home. It is nice to relax with holiday favorites. Surprisingly, there are a lot of feel-good movies. Nothing like a movie to get you in ready for the Christmas spirit. Usually, I enjoy attending Make it event a handmade market with many artists and makers. I love learning new craft ideas and new products. They are unique and inspirational.

Do try these Christmas cookie treat recipes. What are your Christmas traditions? Do you have any? And what are they?

If you would like to try gluten-free cookies, what about gluten-free shortbread recipe.

What about a fun recipe for children?

Banana Bar with Chocolate Chips

Every couple of weeks I love to try a new baked good recipe. My daughter loves anything with chocolate chips. She would easily gobble anything up with chocolate. This week, I made her banana bar with chocolate chips. They have the same shape as granola bars which are easy to snack on. Lately, she seems to love to snack on granola bars. My little calls them Daddy’s breakfast. It is funny the things children come up with.

Chocolaty Goodness

You can be creative with these delicious banana bars. Apply a layer of Nutella on the top and add another banana bar on top to make it into a sandwich. Or, you can allow your little ones to have fun by letting them apply icing on top and let them sprinkle mini chocolate chips or even some nuts. This will be more like a dessert or a treat than a breakfast item. The third option, drizzle chocolate syrup on top of the banana bars and add an assortment of fruits. Just have fun with this.

Banana Bar with Chocolate Chips

Banana Bar with Chocolate Chips Recipe

Ingredient:

5 ripe bananas

3/4 cup of brown sugar

1/4 cup of coconut oil

1/4 cup of non-dairy milk

2 egg replacer

1 3/4 cup of gluten-free flour

1 tsp baking soda

1/2 tsp salt

1 tsp cinnamon

1 cup of mini chocolate chips

Instructions:

  1. Turn on the oven to 350 degrees Fahrenheit. Spry flat baking pan. Set aside.
  2. Peel banana. Mash bananas with a fork. Add brown sugar, oil, non-dairy milk, and egg replacer.
  3. In another bowl, add all dry ingredients. In Separate bowl, add all wet ingredients.
  4. Mix all dry and wet ingredients together.
  5. Take a spatula and fold in chocolate chips.
  6. Pour the batter in the baking pan. Spread it all over a baking pan. Sprinkle chocolate chips on top.
  7. Bake for 18-20 minutes. Check with toothpick to see if the banana bar has cooked through.
  8. Allow it to cool. Cut into squares.

Freeze Them for Later

These banana bars with chocolate chips can be saved for later. You can bake a large batch and freeze them for later. On weeks, where the schedule gets extremely busy no time for baking. You can defrost them the night before and have them in the morning. They are lovely breakfast items. And, you can add some toasted walnuts for texture. Do make these delicious Banana bars with chocolate chips.

If you enjoy cookies for Christmas, do try these gluten-free shortbread cookies.

I would love to try baking gluten-free buns.

Soft Vegan Eggs for Breakfast

Ol loves eggs. When I found his food sensitivity, I know I would need to reduce or eliminate eggs from his diet. My goal is to make vegan eggs for him. My daughter likes eggs but my son loves them. I did not have as much of a difficult task with my daughter. She does not need to eat them daily. My next task is to do some research. Some recipe uses a special type of flours, while others use tofu. I tried to make soft vegan eggs for breakfast.

Vegan Eggs for Breakfast

Soft Vegan Eggs for Breakfast Recipe

Ingredient:

1 tbsp. chicken pea flour

1 tbsp. tapioca flour

1/8 tsp turmeric powder

1/3 cup non-dairy milk

1/2 tsp salt

1/8 tsp Kala Namak salt

1 tbsp. olive oil

1 pkg soft tofu

Instructions:

  1. In a bowl, add all the dry ingredients.
  2. Add oil. Mix to combine.
  3. In a bowl, cut the tofu into cubes. Add dry ingredients and milk together.
  4. In a pan, on medium heat add the mixture in the pan. flip to prevent burning. Allow the mixture to cook on all sides.

About the ingredient

Turmeric: add 1 tsp to give the yellow coloring to resemble eggs

Chickpea flour: gives a dense texture. Once you add liquid to the flour it becomes sticker. Good for baking. Use as a binder for baking.

Kala Namak Salt: Himalayan black salt. The salt adds an eggy flavor. And this spice gives the eggy smell.

Tofu: tofu gives an eggy texture. Does not fluff up

Vegan Eggs for Breakfast

Vegan Eggs

Vegan eggs are plant-based. They can appear to look like real eggs and taste like real eggs. For those who are allergic to eggs, it is wonderful to know there are other options. And those who choose to reduce protein in their everyday life. Plant-based is a healthy alternative. Do try soft vegan eggs for breakfast.

Vegan Eggs for Breakfast

If you are trying to switch to a more of a vegan diet, you might want to try dairy-free ice cream.

And, if you are interested in switching to a vegan diet you might take a look at this article.

Kabocha Sweet Creamy Soup

Now, I am always trying different recipes or ways to sneak more vegetables into my child’s diet. My son does not like carrots or cabbage. I try encouraging him by getting him to one bite even that is difficult. He is a picky eater. However, he loves soup. Why not make him a sweeter soup like kabocha sweet creamy soup.

Kabocha Sweet Creamy Soup

Kabocha Sweet Creamy Soup Recipe

Ingredients:

I medium sized kabocha

3-4 cups vegetable broth or homemade bone broth

4 garlic, minced

1 tsp sea salt

1 cup non-dairy milk

Instructions:

  1. In a medium-size pot, fill with water. Allow the water to boil.
  2. Place the squash in the water. Kabocha should take 10-15minutes to cook. Allow it to cook longer until the squash is soft.
  3. Remove squash from the hot water. Let it cool.
  4. Peel the outer layer. Cut into squares.
  5. In another pot, pour the broth. Add salt and garlic. Then, add the kabocha.
  6. Once the soup comes to a boil. Turn down the stove. Let the soup simmer.
  7. This should cook 20 minutes or pour the soup in the crockpot.
  8. Lastly, add non-dairy milk. Cook for 5-10minutes. Stir occasionally.
  9. Read to serve.
Kabocha Sweet Creamy Soup

How to Sneak in More Nutrient

  • Puree various vegetables like squash, carrot and add to soup
  • Add broth into every dish you cook
  • Make spiral noodle with a vegetable like a carrot and zucchini
  • Make smoothie to sneak in small amounts of kale and spinach
  • Add shredded vegetable into pasta sauce
  • Minced vegetable in a processor to add into omelets
  • Bake vegetable dish with melted cheese
  • Drizzle balsamic vinaigrette to vegetable
  • Added shredded vegetable in the batter of a baked loaf of bread or muffin

What to Know About Squash

How to choose a kabocha squash. You should choose one that feels heavy. Make sure there are no soft areas on the squash. Kabocha is hard to cut with a tougher skin. Be very careful. Take a knife by starting in the middle of the squash. Rock back and forth with your body weight to slowly cut the squash. Continue until you cut the large pieces. The seeds in the center can be eaten as a snack. You can put this aside.

My children and I like this soup. The soup is sweet and creamy. They had a lot. You should try this soup kabocha sweet creamy soup a try.

You might want to try Asian soup for fall. My family loves soup for the fall or even year-round. Maybe the next one I would like to try is a broccoli kabocha soup.

Strawberry Breakfast Pancake

I always have trouble deciding what type of breakfast to make for my kids. They do get bored very easily. What should I make that is different and new often for my kids? Something healthy and tasty. My daughter loves strawberry. Anything with strawberries. Why not a Strawberry breakfast pancake.

Strawberry Breakfast Pancake


Strawberry Pancake Breakfast Recipe

Strawberry Breakfast Pancake

Ingredients:

2 tbsp. sugar

1 egg

1 cup gluten-free flour

1 tbsp. baking powder

3/4 cup milk

2 tbsp. vegetable oil

1 tsp vanilla extract

1/4 tsp xantham gum

1/4 tsp salt

1 banana(mashed)

1/2 cup strawberry (slices)

Instructions:

  1. Do some preparation. Mash the banana. Slice the strawberries.
  2. In a bowl, add dry ingredients. Mix well.
  3. In another bowl, add the wet ingredients. Combine.
  4. Combine the dry and wet ingredients.
  5. Set the bowl aside.
  6. Turn on the stove. Add oil. Use a large spoon to scoop the batter on the pan.
  7. Add slices of strawberries evenly spread out on the pancake.
  8. When one side is done. Flip the pancake. Once both sides are evenly brown. It is ready.
Strawberry Breakfast Pancake

Fun Ways to Have Pancake

  • Cook strawberries with sugar to make a strawberry syrup to drizzle on top of the pancakes
  • Chop strawberry into little pieces to mix with the batter to make it a very strawberry pancake
  • Make a fun breakfast skewer: mini pancake, a slice of banana, mini pancake, with a slice of strawberry, mini pancake, a slice of banana, and mini pancake
  • Pancake sandwich: one pancake with a thin slice of strawberry with whip cream, syrup and another slice of pancake


Strawberry breakfast pancakes are fantastic breakfast items. They are versatile. You can make multiple layers of strawberry pancakes. Or, you can even use it as a dessert dish. First, the pancake, spread a layer of cheesecake filling, pancake, fillings, and continue with as many layers as you like. Then, add strawberry toppings on the top with some whipped cream. On a lazy day, a simple layer of pancakes with your favorite toppings.

If you like the fall, do try my crockpot apple cider recipe.

I would love to make breakfast scones.

Sore Throat Soothing Gummies

These two weeks my kids have been getting each other sick. My poor daughter was coughing so much her throat probably felt raw. She wasn’t feeling well; her throat hurt. My poor little one. I turn on the humidifier in the evening for her and added 4 drops of lemon and eucalyptus essential oil. Maybe the next thing to do is to make sore throat soothing gummies or drops.

Ingredients

lemon juice:

helps with the digestive system and to build the immunity. lemon juice has potassium, vitamin B, vitamin C, calcium, magnesium, and antioxidants. Lemon gives energy and is good for hydration.

ginger:

ginger is good for antioxidant properties and anti-inflammatory.

honey:

honey improves cough symptoms and helps with sleep.

Sore Throat Soothing Gummies

Sore Throat Soothing Gummies Recipe

Ingredient:

2 cup of water

1-inch piece of ginger

1/4 cup of lemon juice

3 tbsp. and 1tsp of honey

4 tbsp. gelatin Knox

Instructions: 

  1. In a small pot, add water and ginger. Let it boil. Once water boils turn to low heat. Cook for 20 minutes.
  2. Remove ginger. There should be 1 cup of water remaining. Add lemon and honey.
  3. Let it cool.
  4. Add gelatin one packet one at a time.
  5. Use a spoon to scoop the mixture into a mold.
  6. Put in the fridge for 15 minutes.

My Son

My love gummies. He enjoys the sore throat gummies and he couldn’t stop eating them. There are other ways to help with coughing or a sore throat like leek soup. Something soothing for the throat. Leek juice relieves flu and cold symptoms. Not only does it help with colds, and leek will help with focus and energy. Do give these sore throat soothing gummies a try if you are not feeling well.

Some ways to build immunity, please take a look at this article.

There are other foods to build immunity, please take a look at this article.

My Daughter’s Vanilla Moist Cake

My daughter’s vanilla moist cake. All she cares about is her birthday cake. She loves cream and maybe the chocolate decoration on top of the cake. Before we have the time to cut the cake she is trying to get the chocolate pieces. Kids. This time I want to make a memorable cake for her. Maybe a princess theme. I don’t have a lot of experience. This time I am trying to make my daughter’s vanilla moist cake with a cream cheese frosting.

Cake

Before I made makes, I made cupcakes which she enjoys. They can be fun. Good size for kids. It can be a little easier with someone like me who is not very experienced with cakes. I decided to venture to more of a regular cake. I love the Food network. These experienced or home baker made these amazing cakes. I am inspired to attempt at a cake. You need to start somewhere. With my daughter’s vanilla cake.

Moist Cake

Ingredients:

2 1/2 cup of all-purpose flour

1 cup of sugar

1/2 tsp baking soda

1 1/2 tsp baking powder

1 tsp salt

2/3 cup shortening

1/4 cup butter

1 cup sour cream

1/2 cup milk

6 egg whites

Instructions:

  1. Preheat oven 325-degree fahrenheit.
  2. Grease two 8inch round cake pans.
  3. In a bowl, mix sour cream, milk, vanilla, butter, and egg whites.
  4. In a separate bowl, add flour, baking soda, salt, and baking powder.
  5. Add shortening and butter. They will be in chunks. Mix with flour mixture.
  6. The mixture should be crumbly.
  7. Add in half of the liquid mixture. Combine.
  8. Mix for 10-15 minutes.
  9. Do not overbeat.
  10. Pour in cake pan.
  11. Bake 325 degree far for 45 minutes -50 minutes.
  12. Let it cool.

Cream cheese frosting

Ingredient:

1/2 cup powder sugar

1 tsp vanilla extract

8 oz cream cheese(room temperature)

1/2 cup butter(room temperature)

Instructions:

  1. Add all ingredients in a bowl.
  2. Mix to combine.

Delicious Cake

I enjoy the taste of the cake. My children decorate with pink sprinkles. They had too much fun. The appearance does not look as appealing but the cake tastes good. Not too heavy or too sweet. This is the second cake I have made. Next time, I would like to decorate the cake with cream roses. Do try my daughter’s vanilla moist cake.

You like to read about my gluten-free chocolate chip cookie recipe.

I would like to try piping rose.

Crockpot Warming Apple Cider for the Fall

The weather is changing quickly. It is getting colder. The fall is here. I have been having a busy September with the new school year. This has been non-stop busy. I love having a warm beverage in the fall. Nice soothing cozy drink. My husband always has a nice cup of apple cider during the fall. The entire house has a lovely aroma when the apple cider is cooking. Crockpot Warming Apple Cider for the Fall


The Fall

I love this crockpot warming apple cider for the fall. This recipe is simple. Great for busy moms. You throw them in the crockpot and forget about it. Mulled beverage feels like the fall season. The aroma smells wonderful. If you add a slice of orange and cranberry in the crockpot. The crockpot looks nice and bright. Very cheerful. The color makes very festive. Nothing like sitting in front of a fireplace with a warm cup of beverage.

Crockpot Warming Apple Cider for the Fall

Crockpot Apple Cider

Ingredients:

8 gala apples

1/2 cup brown

sugar

4 sticks of cinnamon

1 tsp allspice

1 tbsp. clove

10 cup of water

Instructions:

  1. Cut apples into quarters. Put in crockpot.
  2. Put in cinnamon sticks, whole cloves, allspice, and water
  3. Let the crockpot cook for 3 hours on high.
  4. You can mash apple for more flavors. Add in brown sugar.
  5. Cook for another 1 – 3 hours.
  6. Remove solids. Pour the liquid in a jug.

Note: this last in the fridge for one week.

Why you would love crockpot apple cider?

  • Fantastic for chilly days
  • no artificial sweetener
  • use fresh fruits
  • great for all ages
Crockpot Warming Apple Cider for the Fall

Things to make Cider Flavorful

  • Can add pears to make it sweeter
  • If you like more flavor, add more spice like star anise or nutmeg
  • You can make it healthier by switching to honey or maple syrup
  • You can have this as a gathering with friends or for adults with alcohol

Apple cider is a delicious beverage. My children enjoy a cup because apple makes it sweet. This drink contains vitamin C and antioxidants. Great for the heart.

If you like this recipe, you might want to try yogurt bark snacks.

Next time I would like to try making creative birthday cakes for my kids.

Drinkable Yogurt for Breakfast

My children have always love drinkable yogurt. I would buy some once a month on my shopping trip. My children of course especially like the Paw patrol drink yogurt. Lately, my children have been a little more obsessed than before. I have been buying yogurt drink non-stop. Therefore, why not make my own. Make drinkable yogurt for breakfast. These drinks are similar to smoothies.

Drinkable Yogurt for Breakfast

Having a drinkable yogurt, I find to have a healthy probiotic drink is quick and easy to have. When you make your own you can put less sugar and make a healthier choice like choosing honey. Depending on the fruit, you can give your body a healthy nutrient. Children need their calcium and drinkable yogurt will help with this. My daughter’s Naturopath Doctor address the importance of a healthy gut. Gut health can improve food sensitivity.

Recipe

Ingredient:

3/4 cup of Liberte yogurt

3/4 cup of milk

splash of vanilla

1 banana

Drinkable Yogurt for Breakfast

Instruction:

  1. In a blender, add in all the ingredients. Allow it to combine together.
  2. Once done.
  3. Enjoy

What to look for in a yogurt

What to look for in a yogurt. Yogurt should have mainly both milk and probiotic cultures. The yogurt will have vitamin D and Calcium needed for your body. To avoid added sugar. The added sugar makes yogurt unhealthy. Too much sugar does hurt the body’s health. The yogurt selected should not have added sugar. Yogurt already has natural sugars so no need to add an additional amount. The best flavor is one without any flavor.

Live Cultures

Probiotic bacteria help to make yogurt. It turns sugar into lactic acid that gives yogurt the sour taste.

Yogurt Drink

My children love the pineapple mango yogurt drink. Do you have any favorite ones? There are various other flavors you can make like vanilla, strawberry, peach, blueberry, and papaya. You can always experiment to see what combination you would like.

If you want to eat healthier, you might want to snack on yogurt bark treats.

What would I like to try? I would love to try crockpot blueberry casserole.

Time for Donut Snack

I love trying new recipes. Experimenting with new ones, I enjoy making what my children like to eat. My children can be snack monsters. It is always good they have good appetize and loves to eat. My mom loves trying new dishes I believe I got this from her. Therefore, I love the challenge of trying to make something different or new. It is fun. Sometimes it can be stressful but once you get this it is very rewarding. This time is time for donut snacks.

Time for Donut Snack

Love of Sweets

Lately, my son seems to have a love for donuts. Timbites. He loves the little donut with fillings. He is little. Timbites are prefect size for him. And, my son can eat a lot of the Timbits. They are easy for him to eat and not messy. Nothing like making homemade donuts. There is always time for donut snack.

Fun Facts about Donut

  • The glazed donuts are the most popular donut
  • How Small bite-size donut came to be. The small donut came from leftover dough in the middle of the donut.
  • The word ‘doughnut’ is the correct word and ‘donut’ is acceptable as well
Time for Donut Snack


Time for Donut Snack

Donut Recipe

Ingredient:

1 1/2 cup of whole wheat all-purpose flour

1/3 cup sugar

2 tsp baking powder

1/2 tsp salt

1/2 tsp ground nutmeg

1 large egg

1/2 cup whole milk

2 tbsp. unsalted butter

oil for frying 1/2 – 1 cup

1/2 cup sugar(sprinkle on top)

Instruction:

  1. In a bowl, add flour, baking powder, salt, and nutmeg. In another bowl, combine egg, milk, and butter. Combine.
  2. Put the dry ingredient in. Mix to combine.
  3. In a small pot. Add oil. Warm oil to 375 degrees Fahrenheit.
  4. Use a small round ice cream scoop. Cook five to six donut at a time.
  5. Flip to allow the other side to cook. Once the donut turns brown. Cook for 1-2 minutes. The donut is ready.
  6. Once done. Place on a paper towel. Sprinkle sugar on top. It is time for donut.


Tips for Donut Making

Before frying donut, make sure there is enough oil in the pot. About one cup of oil or more. Don’t let donut hit the bottom of the pot when placed in the pot.

The frying temperature should be 360 – 375-degree Fahrenheit

Love for Donut

Donut is fun to eat. Not only my children love them. I have fun eating them. Sometimes Mom needs a little sugar to deal with the high energy kids. There is always a time for donut snack.

Next time I would love to try a gluten-free donut hole recipe.

You might want to look at my other bake good recipe.

Healthy Soft Loaf of Bread

I started making gluten-free bread due to my daughter. This started when my daughter became sensitive to gluten. In the past, I never made a loaf of bread until gluten-free bread. I didn’t know the basics of making a regular loaf of bread. I still struggle with the rise of the loaf. However, the tip that helped me is to set the oven at 200 degrees F for 30 seconds. Then, turn off the oven. Place the loaf in the oven for 30minutes. This helped me with a healthy soft loaf of bread.

Healthy Soft Loaf of Bread

Now, I want to attempt at a regular loaf of bread. The healthy soft loaf of bread. Making a regular loaf of bread can be stressful, a regular loaf would bring me some comfort, and this might help me to understand more about bread. I love a loaf of bread. It is soft, fluffy, and moist. My favorite is to make bread for a sandwich. It is comforting to make gluten bread. Something easier than gluten-free bread.

Healthy Soft Loaf of Bread

What to Know About Yeast

Yeast is a saccharomyces cerevisiae. Yeast consumes starch and sugar and pass gas. Yeast breaks down grain.

There are four Types of Yeast

There are four types of yeast: dry, instant, fresh, and wild. The more common ones are dry and instant. Dry yeast has been ground to form into granules. The yeast is not active. Once activated it will eat the starch. How to activate the yeast. Mix yeast with water and sugar. Wait for 10 minutes. This becomes bubbly. And activated. Instant yeast can be activated by mixing up with dry ingredients.

Learn About Gluten

Gluten is in wheat, barley, and rye. Flour is a protein in a resting stage. When the liquid is applied, it reacts. Need to be careful with gluten. Too much work on the dough will affect the texture.

Healthy Soft Loaf of Bread

Healthy Soft Loaf of Bread Recipe

Ingredients:

1 1/4 cup of milk

1/3 cup of old fashion oat

1 tbsp. honey

2 1/4 tsp quick rise yeast

3 tbsp. butter

2 cup bread flour

3/4 cup whole wheat flour

2 tbsp flax seed

1 tsp salt

2 tbsp sunflower seed

1 tbsp sesame seed

1 tbsp poppy seed

topping:

2 tbsp old fashion rolled oat

1 tbsp sunflower seed

Instruction:

  1. In a bowl, warm up milk to about 115 degrees F
  2. Add in oats, yeast, and honey. Let it sit for 5 minutes.
  3. Then, add butter. After butter, add in bread flour, whole wheat flour, flaxseed, and salt. Mix well.
  4. Do add sunflower seeds and sesame seeds. Mix together.
  5. Mix with the hand for 10minutes.
  6. Cover the dough. Let the dough rise for 60minutes.
  7. Once it reaches 60 minutes. Spray the loaf pan. Knead the dough.
  8. Cover loaf again with the towel. Allow the dough to rise for 60minutes.
  9. Once the dough reaches 60minutes. Turn on the oven to 350.
  10. You can add sesame seed and sunflower seeds on the top of the bread.
  11. Bake for 35minutes.
  12. Allow to cooling for 10 minutes.
Healthy Soft Loaf of Bread

Healthy Soft Loaf of Bread

My favorite meal is to have a lovely sandwich during lunchtime. Nothing like a soft loaf of bread. It is a lot of fun to make your sandwich bread. A slice of turkey, some spinach, slices of gooey cheese with a crunch from the toasted bread. You should try this healthy soft loaf of bread.

Next time I should attempt at a recipe for soft multigrain bread. 

You can take a look at the gluten-free recipe I had tried.

Rubble Paw Patrol Birthday Cake

My son’s birthday is coming up. I want to do something fun and different from what I usually do. Now, is getting older and is more aware of things. His favorite cartoon character is Rubble from Paw Patrol. I think it would be fun to make the theme a Paw patrol one. He will be very excited. Rubble Paw Patrol Birthday Cake

Rubble Paw Patrol Birthday Cake

Cake Base

I used my gluten-free, dairy-free, and egg-free chocolate cake recipe. You can find my recipe here. Or, you can use a cake recipe you like or is comfortable with.

Chocolate Buttercream Frosting

Ingredient:

1 cup butter

2 cup powder sugar

1 tsp vanilla extract

1 cup semi-sweet chocolate chip

Instructions:

  1. In a bowl, use an electric mixer to mix the butter on medium speed. Blend until fluffy.
  2. Slowly add sugar little by little. Mix until creamy. Add vanilla extract.
  3. In a small pot of water, place the metal bowl with chocolate on top. Turn on the stove. Stir regularly until melted. Once done put aside.
  4. Add the mixture with the chocolate. Combine.
  5. The frosting is ready to be used.

Note: If refrigerated the butter will harden. Place the frosting in room temperature to soften the frosting.

What You would Need

  • 9 bars of kit kats
  • 1 box of Dad’s chocolate cookies
  • 1 bag of Maltesers
  • 2 bars of coffee crisps

The Preparations

  • blend the Dad’s cookies into crumbs
  • Split the Kitkat bars into individual bars
  • Cut the Coffee crisps into chunks

Cake Assembly

  • Chill the cake
  • apply a trail of Dad’s cookie crumbs where you would want Rubble on
  • place the chunks of the coffee crisp in a path
  • Place Maltesers balls all over the top of the cake

Rubble Paw Patrol Birthday Cake


This is how I assemble the Paw Patrol Rubble Construction Cake. Next time, I might use OMG clusters to give an uneven surface for the cake. I might break the Maltesers apart. You can be as creative as you want. I find this fun. What have you tired? What would you do? Any suggestions? for the Rubble Paw Patrol Birthday Cake?

Why do we have Red Bean Dessert?

Why do we have Red Bean Dessert?Why do we have Red Bean Dessert?

What is red bean dessert good for? It is perfect to have it cold in the summertime and hot in the winter time. You can add various ingredients to the red bean dessert too, however, the way you like the dessert. Chinese have this dessert regularly and it is very nutritious, good for your health.

Nutritional Value

This red bean dessert is rich in vitamin B and E. It contains minerals such as magnesium, potassium, iron, zinc, copper, and manganese.

Chinese Nutrition

This dessert helps to remove any coldness from the body. The coldness is due to partaking cold food regularly. There are times your body cannot tolerate a large amount of cold food, therefore, your body does not react well. Then, you would need to eat something to balance out your body. Red bean helps with constipation.

Red Bean Variations

You can add red bean with either date, lotus seed, and sago, or coconut mill and logan.

Why do we have Red Bean Dessert?History of Red Bean

Where does the red bean come from? They are a seed from a flowering plant called legumes. The bean comes from pods. It is very important to cook the bean before eating. This is the safest way. And the bean would be too hard to chew without any cooking.

Red Bean Dessert Recipe

Ingredient:

1 cup red adzuki bean                        1/2 cup sugar ( or rock sugar)

1 1/2 tbsp. tapioca pearl                     6 cup water

Instruction:

  1. Soak red bean overnight.
  2. Fill a pot with water. Once boiled, add red bean. Turn down the heat. Allow it to simmer for one hour. Stir regularly.
  3. Add the sugar. When the sugar dissolves, add tapioca pearl. Cook for 15-20 minutes. Stir constantly.
  4. After the tapioca become translucent. If the dessert too thick, do add more water. Let it cook until desired thickness.

Red bean dessert is fantastic for everyday dessert. This dessert is great for an upset stomach. This dessert is not too sweet and is versatile; it has many benefits for the body.