Peanut Butter Muffin

Peanut Butter Muffin. I have some ripe bananas I need to use. Furthermore, I decide to use bananas to make a peanut butter muffin. I can not forget my daughter’s favorite ingredient chocolate chips.

Peanut Butter Muffin

Peanut Buttery Muffin

ingredients:

2 large brown bananas

1 cup creamy peanut butter

1 egg

1/4 cup honey

4 tbsp. gluten-free four

1 tbsp vanilla extract

1 tsp baking powder

1/2 tsp salt

1/2 cup mini chocolate chip

Instructions:

  1. First, turn on the oven at 400 degrees F.
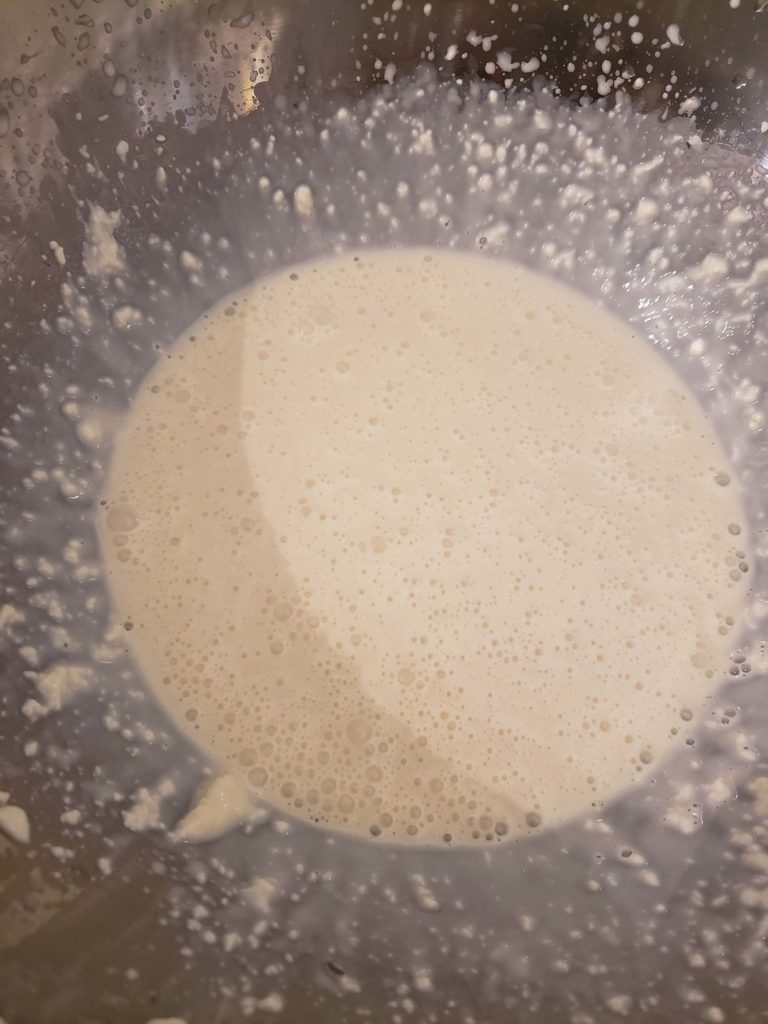
  2. At this time, with a large bowl add all the ingredients bananas, eggs, gluten-free flour, baking powder, peanut butter, honey, vanilla extract, and salt. Mix.
  3. Next, take a spatula to fold in chocolate chips.
  4. Secondly, brush the oil on the muffin tin or place muffin liners in the baking pan.
  5. Then, fold in the chocolate chips.
  6. Finally, bake 12 – 14 minutes.

Peanut Buttery Muffin

Tips to make the Muffin

Importantly, the peanut butter used should be soft. In particular, if you have fluffy muffins do allow egg and butter to sit at room temperature before baking. As a result, the oil used would be better than butter. Thus, the oil keeps the muffin extra most compare to butter.

Do try this muffin. If you enjoy the muffin, do try vegan omelet. I would love to try new dishes like no bake peanut butter bar.

Granola Mix Healthy Snack

Granola Mix Healthy Snack. I tend to like the trail mix with just the nuts I am not too crazy about dried fruits. However, my husband loves the granola mixture of both nuts and dried fruits. On the other hand, granola mixes do contain nutrients that people do not tend to consume on a daily basis. Hence, any nutrient people tend to forget but are important. Therefore, it should have antioxidants, fiber, and good fats.

Granola Mix Healthy Snack Recipe

Trail Mix Healthy Snack

Ingredient

  • 2 cups rolled oats (gluten-free)
  • 2 cups chopped nuts (walnuts, almonds, cashew, sunflower seed,)
  • 1 tsp cinnamon
  • 1/4 cup coconut shred
  • 1/4 cup coconut oil
  • 1/3 cup honey (or maple syrup, if vegan)
  • 1 tbsp vanilla

Instructions

  1. Start by preheating the oven to 350 degrees F. And with a baking pan, place parchment paper.
  2. Secondly, with a large bowl add gluten-free oats, nuts, and cinnamon. Mix.
  3. Next, with another bowl, add in the liquid ingredients coconut oil. Then, honey in the mixture. After mixing, add in vanilla.
  4. Finally, pour the liquid mixture all over the dry ingredients in the big bowl. Take a spatula to fold everything together. With a spatula, press the mixture onto the pan.
  5. Bake 25 – 30 minutes. (The mixture should be crunchy and golden brown.)
  6. After 30 minutes, remove the oven. Let it cool.
Trail Mix Healthy Snack

What should a Healthy Granola Mix have

  • less than 2,300 mg sodium per day
  • best to avoid chocolate or yogurt raisins to avoid the sugar
  • Be careful of the seasoning and the sweetness does add extra calories
  • One serving in a bag to prevent overeating
  • healthier to have homemade trail mix

Save Money on Granola Mix

How to save money on granola mix. How to approach this by making very own dried fruits with either a dehydrator or use its own oven. Thus, many options do include having fun with various dried fruits such as strawberries, blueberries, pineapples, coconut, papaya, etc. Also, do buy nuts that which have not been roasted and in bulk.

Do try this granola nut mix healthy snack. If you enjoy homemade products, do try breakfast cookies. I would love to try more gluten-free baked goods it can be challenging but fun once you become successful in a dish frittata.

Coconut flour flatbread

Coconut flour flatbread. It is challenging to find food my children love. Children can be very picky eaters. During the morning, my son does not eat much I want to have a healthy breakfast. In particular, I want to make quesadilla for him. First, I want to make a flatbread. Secondly, I can add either avocado and chicken or avocado with cheese.

Coconut flour flatbread

Coconut flour flatbread

2 tbsp psyllium husk

1 cup lukewarm water

1/4 tsp baking soda

1/2c coconut flour

1 tbsp olive oil

1/4 tsp salt(optional)

Instructions:

Coconut flour flatbread

The ingredients:

Psyllium husk adds a crunch. Alternately, do reduce the amount of psyllium husk, chia seed or flax seed instead. Furthermore, use almond flour in the recipe to give more flavor. Undoubtedly, this nut flour gives a nutty flavor to the flatbread. Indeed, almond flour gives the flatbread a lovely brown or golden color. Besides, the batter mix with zucchini puree will give a flexible and bendable wrap. Flatbreads are versatile and fun to eat.

If you enjoy baked goods, do try breakfast cookies.

I would love to try other breakfast recipes like oatmeal.

Breakfast Energy Cookies

Breakfast Energy Cookie is wonderful on the go snack. When I am short on time, I have no time for breakfast. I want something that provides me with healthy nutrition and energy. However, I want something good for me. Breakfast cookies are great for anyone who is always on the go. Hence, the cookies are hearty. Evidently, the cookie is gluten-free, dairy-free, and delicious.

Breakfast Energy Cookies

Breakfast Energy Cookies

1 banana

1/2 cup cranberries

1 cup gluten-free rolled oats

3 tbsp maple syrup

1 tbsp chia seed

1/2 tsp baking powder

1 tsp cinnamon

1/2 cup gluten-free oat flour

1/4 tsp salt

2 tbsp almond milk

3 tbsp coconut oil

  1. Turn on the oven to 325 degrees F. Then, In a bowl, combine oat, oat flour, dried cranberries, chia seed, cinnamon, baking powder, and salt. Whisk together.
  2. And, mashed the banana. Secondly, add it to the bowl with all the ingredients.
  3. Moreover, add in coconut oil, sugar, and almond milk.
  4. Thus, take a spoon scoop some batter on a baking sheet above a baking tray.
  5. At this time, flatten the cookie. Note: this cookie does not expand but does leave room between each cookie.
  6. Subsequently, bake for 15 minutes. The cookie should appear golden brown.
  7. Let it cool.
Breakfast Energy Cookies

Why Should you love breakfast Cookies:

  • can be frozen
  • natural sugar
  • it is like a dessert
  • texture
  • tasty
  • easy to make

Why a cookie is a healthy option:

  • variety of seeds
  • nut butter
  • gluten-free oats for fiber
  • healthy nuts
  • maple syrup or honey
  • dark chocolate

Make cookies Correctly:

How to make cookies correctly. Do flatten cookies to cook more quickly. Hence, do give the cookies a form. As well as that if anyone who desires a sweeter cookie, do add raisins to make it into a treat. If anyone enjoys a caramelized flavor, add brown sugar to it. Undoubtedly, oatmeal cookies are a wonderful breakfast item. Consequently, these cookies satisfy as a healthy dessert by adding dark chocolates. In addition, add in cinnamon to make the cookie a stronger flavor. Do try these breakfast energy cookies.

If you enjoy baked goods, do try a peanut butter granola bar.

I would love to try more snack ideas like granola snacks.

Peanut butter granola bar

Peanut butter granola bar. On my shopping trip, I am always buying granola bars. Undoubtedly, my daughter has her favorites and my husband has her favorite types. Apart from this, the cost adds up on the receipt. Therefore, I want to try making my granola bar. Moreover, in the past, we tend to have a chocolate chip flavor quite often. I think it would be good to try something different.

Granola Bar

Peanut butter granola bar

Ingredients:

Dry:

1 cup gluten-free rolled oats

1/4 cup gluten-free oat flour

1 tsp ground cinnamon

1/4 tsp salt

Wet:

2 tbsp coconut oil

1/4 cup & 2 tbsp natural peanut butter

3 tbsp maple syrup

3 tbsp coconut sugar

1 tsp vanilla extract

Instructions:

  1. Turn on the oven to 350 degrees F. Following, use an 8-inch square pan or two loaf pans.
  2. Secondly, in a bowl, add in the dry ingredients oats, oat flour, cinnamon, and salt. Mix to combine.
  3. Then, with a medium-size bowl, add in the wet ingredients coconut oil, peanut butter, maple syrup, coconut sugar, and vanilla. Whisk.
  4. Then, combine the wet ingredients with the dry ingredients.
  5. Next, transfer on to the baking tray.
  6. Finally, bake for 15 – 20 minutes. The bar should be golden brown.
  7. Allow the bars to cool before cutting.
  8. Enjoy!
Peanut butter granola bar

Healthy Bar

To have a healthy bar, there are important things to pay attention to. Of course, it is important to focus on sugar. Thus, bars are better to use natural sugar from dates or natural maple syrup rather than table sugar. Furthermore, do choose good fat for the body such as nuts and seeds. These fats will make the body feel fuller. And the body will feel better. Besides, a good combination is to have good fiber, protein, and healthy fats.

Do try this peanut butter granola bar. If you enjoy baked goods, do try Jam thumbprint cookies.

I would love to try more baked goods like cinnamon rolls.

Gluten-free Snack Bars

Gluten-free Snack Bars. C loves the Makegood granola bars not too sweet and they are gluten-free. The bars are nut-free and dairy-free a wonderful on the go snacks. These couple of months, I would love to try to save money by making my snacks for the kids. First, I want to make granola bars. Surprisingly, my kids are snack monsters. They love to eat. However, I believe I spend too much money on snacks. In other words, I would need to focus on homemade snacks.

Gluten-free Snack Bar recipe

Gluten-free Snack Bar recipe

Ingredients:

1/4 cup non-dairy milk

1/4 cup nut butter(or sunflower butter)

2 cup of gluten-free quick oats

1/4 cup almond flour

1/4 tsp salt

1 tsp vanilla extract

1/4 cup dark chocolate chip

Instructions:

  1. Turn on the oven to 350 degrees. Take a baking pan 8 x 8 or something larger. Subsequently, place parchment on the pan.
  2. With a large bowl, mix gluten-free oats, almond flour, and salt.
  3. Then, add the following honey, nut butter, and non-dairy milk. Secondly, whisk or stir together.
  4. Scoop the mixture onto the baking tray. Spread the mixture with a spatula and press down.
  5. Last but not least, scoop the mixture onto the baking tray. Finally, spread the mixture with a spatula and press down.
Gluten-free Snack Bars

Granola Bars Types

Snack bars have much different texture from crunchy, chewy, hard, or soft. Therefore, to make the bar chewy, do add eggs to the mixture to make the snack soft. Furthermore, for a crispy bar, make the mixture is spread thinly and evenly on a baking tray. Press down firmly with something hard to take a more perfect shape. Additionally, a granola bar is fun to make by using dried fruits, or by dipping them in chocolate syrup.

Do try a gluten-free snack bar. What type of granola do you like? What type do you like to make?

Do try this granola bar. If you enjoy homemade breakfast items, do try gluten-free bagel. I would love to try new gluten-free snack items like kale chip recipes.

Gluten-free Sweet Aroma Loaf

Gluten-free Sweet Aroma Loaf. Mashed fruits like apples or bananas make the loaf nice and moist. Also, yogurt makes baked goods soft. Furthermore, it initiates the baking process by allowing it to work with the baking soda. Therefore, this makes the loaf fluffy. The combination of brown sugar and cinnamon makes the whole house smell sweet like honey. What a lovely sweet smell.

Sweet Aroma Loaf Recipe

Ingredients:

Gluten-free Sweet Aroma Loaf

Ingredients

  • 2 ripe banana

  • 1 tsp baking soda

  • 1 tsp vanilla extract

  • 1/2 cup coconut flour

  • 1/4 cup unsalted butter

  • pinch of salt

  • 1 tsp cinnamon

  • 2 eggs

Instructions:

Directions

  • Begin by preheating the oven to 350 degrees. Brush oil onto the loaf pan.
  • In a bowl, mask the bananas.
  • Melt the butter in a small bowl.
  • Then, in a medium-size bowl add the butter and bananas together. Whisk.
  • Whisk in the baking soda, salt, cinnamon, and sugar. Mix.
  • Add in the coconut flour and mix well.
  • Finally, pour in the batter in the loaf pan.
  • Bake the loaf for 35- 45 minutes.
Gluten-free Sweet Aroma Loaf

Gluten-free Baking

Gluten-free flour does not act like regular flour. It does not keep the batter together. Without a doubt, need to have an experiment with different gluten-free flour mixture to hold the baked goods together. Low protein flour is rice, millet, and cornflower. High protein flour is made from legumes or beans. Do add protein flour when baking gluten-free baked goods instead of using water. Try using eggs instead of just using water. And, use xanthan gum or guar gum about 1/8 – 1/4 tsp to 1 cup of gluten-free flour. Do not add too much or the bread will be gummy.

Do try Gluten-free Sweet Aroma Loaf. If you enjoy gluten-free breakfast items, do try gluten-free bagels.

I would love to try more gluten-free breakfast or snack items like gluten-free pretzel.

Zucchini Gluten-free Bread

Zucchini Gluten-free Bread. Why not increase the vegetable in the diet by adding more to a breakfast item. Breakfast can be challenging to have more vegetables unless you add a vegetable smoothie or have omelets in the morning regularly. Without a doubt, do try to add some to bake goods. No one would know there are vegetables in the loaf. Undoubtedly, the loaf would be nice to moist.

Zucchini Gluten-free Bread Recipe

Zucchini Gluten-free Bread

Ingredients:

zucchini 1

gluten-free 1 1/2 cup

sugar 1/2 cup

eggs 2

butter 1/4

vanilla extract 2 tsp

baking soda 1 tsp

salt 1/2 tsp

cocoa powder 1/4 cup

chocolate chip 1/2 cup

Instructions:

  1. Preheat the oven to 350 degrees.
  2. Grate the zucchini. Remove the extra liquid with a cloth by squeezing the excess water.
  3. First, place eggs, sugar, butter, and vanilla extract in a large bowl. Stir to combine.
  4. Next, with another bowl, add the following gluten-free flour, baking soda, cocoa powder, and salt. Mix well.
  5. Combine together the first mixture with the second mixture.
  6. Once combined, add in the zucchini.
  7. Finally, add in the chocolate chips. Stir to combine.
  8. Spray the loaf pan. Pour in the batter.
  9. Do bake for one hour. Check the loaf with a toothpick to see if it is done.
  10. Once done, let it cool.
Zucchini Gluten-free Bread

Adding Vegetable

Tips to add more vegetables to baked goods. Besides zucchini how about sweet potato which has a natural sweetness. Moreover, this can be mixed into the cookie batter. Also, pumpkin puree in a cupcake or muffin. Minced cauliflower or broccoli in a sandwich loaf. And, why not shredded spinach in a muffin mixture. Along with the shredded spinach, there are also thinly sliced carrots or grated ones. There are many options to add more vegetables in the diet.

If you love to add more vegetables to your diet, do try spiral zucchini noodles with your meal. I would love to try something like carrot cake muffin.

If you like to learn more about shareasale, do visit the link below.

Fluffy Gluten-free Bread

Fluffy Gluten-free Bread. I am always looking to explore gluten-free bread recipes. The bread that is soft and fluffy. Moist bread like a fluffy pillow. In the past, I have tried ones that rise or tones that haven’t. A gluten-free recipe can be very challenging. After frozen, it would not crumble.

Fluffy Gluten-free Bread Recipe

Fluffy Gluten-free Bread

Ingredients

  • Yeast Mixture
  • 2 1/2 tsp active yeast

  • 1/4 cup warm milk (105 – 110 degrees)

  • 3 tbsp. honey

  • Dry Ingredient
  • 2 cup brown rice flour

  • 2/3 cup tapioca flour

  • 1/3 cup arrowroot flour

  • 1/3 cup almond flour

  • 1 tsp baking powder

  • 1 1/2 tsp salt

  • 3 tsp xantham gum

  • Wet Ingredient
  • 3 eggs

  • 1/4 cup unsalted butter

  • 1 cup milk

Directions

  • In a small bowl, warm the milk the temperature should be between 105 – 110 degrees. Add in honey and yeast. Set aside to wait for the mixture to bubble. This should take 10 minutes.
  • With a separate bowl, put in all dry ingredients brown rice flour, tapioca flour, arrowroot flour, almond flour, baking powder, salt, and xantham gum. Mix to combine all the dry ingredients.
  • Another bowl, crack and mix the eggs.
  • Take a bowl, warm the butter and milk in the microwave. Stir.
  • In a large bowl, add in the butter and milk mixture. Next, add in the yeast mixture. Mix.
  • Afterwards, pour in the flours. Combine the mixture. Finally, pour in the egg mixture. Stir the ingredients together. Do not over mix. Turn on the oven to 200 degrees for proofing. After 30 seconds, turn off the oven.
  • Spray the loaf pan. Scoop the dough into the pan. Wrap the loaf pan with plastic wrap. Put a warm towel on top to cover the loaf.
  • Place the loaf pan in the oven for proofing. Set the timer for 1 /2 an hour.
  • Remove the loaf from the oven. Preheat the oven at 350 degrees. Take off the towel and plastic wrap.
  • Bake for 45 minutes.
  • Once done, let it cool.
Fluffy Gluten-free Bread

Bread

There are different flour mixture for gluten-free bread I have tried. Some recipes use four different flours and some use more or less. What bread recipe or mixture have you tried? How many flour combinations are there? Or, which ones do you prefer?

Do try this fluffy gluten-free bread. If you like baked goods try gluten-free scones. I would love to try more gluten-free baked goods.

Lemon Cake Dessert

Lemon Cake Dessert. Last month my mother in law made a breakfast loaf my son couldn’t stop eating. I wanted to make something similar. Lemon helps to prevent the cake from becoming too heavy. Citrus makes the cake light and refreshing. A slice of lemon always brightens up a dish with a lovely yellow color. Also, lemon can help with the greasiness of the food.

Lemon Cake Dessert Recipe

Ingredients

  • 1/2 cup of olive oil

  • 1 cup of sugar

  • 1 lemon zest

  • 2 eggs (room temperature)

  • 1/2 cup non-dairy milk or almond milk

  • 2 tsp baking powder

  • 1/4 tsp salt

Directions

  • Turn on the oven to 350 degrees. Take a loaf pan. Brush with oil.
  • With a small dish, put in the zest of a lemon. Take a lemon and juiced it. Reduce the lemon juice in a small pot on a stove. Let it cool.
  • In a medium to a large bowl, whisk olive oil, sugar, and lemon juice.
  • Then, add one at a time. Mix to combine together.
  • Afterward, add in non-dairy milk and lemon juice. Combine.
  • In another bowl, mix dry ingredients gluten-free flour, baking powder, and salt.
  • Mix the dry ingredients into the wet mixture.
  • Scoop and pour the batter into the loaf pan. Bake for one hour.
  • Once done. Allow the loaf to cool.
Lemon Cake Dessert
Lemon Cake Dessert
Lemon Cake Dessert
Lemon Cake Dessert

Loaf goes with

What goes well with a loaf cake? A homemade fruit sauce with fresh berries or fruit cooked to reduce. How about a lovely jar of fruit jam from blueberries to strawberry jam. If the preference is to have a fruity loaf cake or just a simple icing on top. Another thing, this can be treated as a dessert after dinner maybe with a scoop of ice cream on top. A healthier option is to sprinkle some nuts on top.

Do try Lemon Cake Dessert. If you enjoy baked goods, why not give baked bagel a try. I would love to try a gluten-free English muffin.

Simple Gluten-free Bagel

Simple Gluten-free Bagel. A bagel can be challenging. I attempted bagels a couple of times without any success in the past. This time I am trying a recipe without yeast. Working with yeast can be difficult, yeast has to be between 105 – 110 degrees and not over. Therefore, there will not be yeast in this recipe. Just simple gluten-free ingredients.

Simple Gluten-free Bagel Recipe

Ingredients

  • 1 cup gluten-free flour

  • 1/2 tsp baking powder

  • 1/2 tsp salt

  • 3/4 cup plain yogurt

  • 1 egg

  • optional: sesame seeds

Directions

  • Turn on the oven. Set it at 375 degrees.
  • Use a medium to large bowl, add flour, baking powder, and salt. Mix together.
  • With the dry mixture, make a hole in the center. Scoop in the yogurt. In a separate bowl, whisk the egg. Then, add in the whisked eggs to the well in the dry mixture.
  • Start by folding. Spray a baking sheet or place parchment paper onto the pan. Take a spoon and scoop into a baking pan. Make a hole in the center.
  • Continue this until there is no more dough. Season with salt and pepper. Bake 25 – 28 minutes. Do check to prevent the bagel from burning or overcooking.
  • Lower the temperature to 350 degrees to bake the bagels. If you need additional baking, bake for another 10 – 15 minutes.
Simple Gluten-free Bagel

Things to Know

When baking gluten-free items, take items out earlier. Let it sit at room temperature to warm up. Important for the dough to be overmixed.

Baking Tips

This mixture uses Greek yogurt which helps to hold the bagel together. The bagel will be chewy, soft, and tasty. Gluten-free flours are very fine. Therefore, it is best to use a scale and weigh to be precise. Gluten-free baked goods would require more time at a lower temperature. Do try Simple Gluten-free Bagel.

If you enjoy baked goods, do try donuts. And, I would love to explore more baked goods and learn more baking techniques. Maybe try a Parsnip hash brown breakfast item.

Crunchy Gluten-free Waffle

Crunchy Gluten-free Waffle. Waffle made with sweet maple syrup. The fun part of the waffle is there are many different combinations for the batter. Or, there are many things to add to the batter to make it healthier or more nutritious. Do add Greek yogurt for a more moist waffle. Sprinkle some blended flax for more fiber. In fact, add in mashed banana or applesauce for a sweeter taste with natural sugar. Much less sugar in the batter, this will be a healthier breakfast.

Crunchy Gluten-free Waffle Recipe

 Crunchy Gluten-free Waffle

Ingredients

  • 2 cup of gluten-free flour

  • 1 tbsp. sugar or honey

  • 1/4 tsp salt

  • 1/2 tsp vanilla extract

  • 2 eggs (room temperature)

  • 1 3/4 non-dairy milk

  • 1/2 cup coconut oil

Directions

  • In a bowl, add the dry ingredients gluten-free flour, sugar, and salt. Mix to combine.
  • With another bowl, add all the wet ingredients vanilla extract, eggs, non-dairy milk, and coconut oil. Stir.
  • Pour the wet ingredients into the dry mixture. Whisk to the mixture together.
  • Take out a waffle maker. Spray or use a brush to apply oil on the surface.
  • Scoop batter into the waffle maker. Close the waffle maker. Once done. I like to flip the waffle to make it nice and crunchy. Note: this recipe makes 8 pieces.

Unique Flavor

If you are tired of the typical waffle, maybe it is time to be adventurous and to try different flavors. How about peanut butter with chocolate? By the way, if you are fond of chocolate do try it with grated orange. Furthermore, try a nutty waffle by using chickpea with an egg on top. How about making a cup of tea like London fog waffle with some whipped cream on top.

What would you like to try or experiment with? Do have some fun. Maybe fall with one of your combinations.

If you enjoy breakfast items, do try breakfast scones. I would love to try more breakfast items like gluten-free breakfast cake.

Join shareasale.com, Earn Cash!

Cheesecake Loaf

Cheesecake Loaf. This creamy loaf has a slightly tangy flavor. Bread has a cheesy soft texture on the inside. All cheesecake lovers should try breakfast loaf, if you love cheesecake you would like this. The loaf uses simple ingredients. Why not try this for breakfast.

Cheesecake Loaf Recipe

Ingredients:

1 cup cream cheese

200 ml heavy cream

100 ml unsweetened yogurt

1/2 cup granulated sugar

2 egg

2 tbsp. corn starch

pinch of start

Instructions:

1. Preheat oven 320 degrees. Do boil water for the water bath. Spray the pan with a loaf pan.

2. Add all the ingredients into a bowl. Mix all the ingredients together with an electric mixer. Make sure they are all mixed well.

3. Pour the batter into the loaf pan.

4. Place the loaf pan in the pan with boiling water.

5. Do bake for one hour.

6. Take the pan loaf and place it on the counter to let it cool.

7. Once cool, refrigerate. This should be ready tomorrow.

Cheesecake Loaf
Cheesecake Loaf
Cheesecake Loaf
Cheesecake Loaf

Goes Well with Cheesecake Loaf

Strawberry jam goes well in between two slices of these loaves. Or, how about whipped cream in the middle. Do add fresh berries like a sandwich. Maybe a layer of chocolate with the bread toast. Of course, do try different fresh berry jam with the cheesecake loaf. Cheesecake will be less heavy by having ricotta cheese filling rather than cream cheese. Add kosher salt to the recipe to make it savory. Sweet and savory breakfast loaf.

If you enjoy breakfast baked goods, how about strawberry pancakes.

I would love to try more breakfast items such as Spinach quiche.

Gluten-free Scones

Gluten-free Scones. My hubby loves scones. The kids do like the cheesy ones. Who can resist the flaky buttery goodness of the soft scones. Scones are a wonderful breakfast item to have with tea or coffee. How about splitting the scones and adding a little bite of jam. With bake goods, I always love breakfast items. They can be a lot of fun. It is amazing what you can do with flour. Flour can be used to make all these tasty treats.

Gluten-free Scones Recipe

2 cup of gluten-free flour

1/4 cup extra flour (this is for rolling the dough or transfer to baking tray)

1/2 cup sugar

2 tsp baking powder

1/8 tsp salt

2 egg

1/2 cup non-dairy milk

1 tsp vanilla extract

1/2 cup of butter(cold)

Optional: 1/2 cup toppings like blueberries/cheddar cheese

Instructions:

1. Pre-head the oven. Oven should be 350-F.

2. With a bowl, add in gluten-free flour, sugar, baking powder, and salt.

3. Cold butter should be cut into small chunks. Add in to the bowl with the dry mix.

4. If you have a pastry blender to get the butter into the flour. Or, I used a potato masher to do the same. Do this until the butter is in little pieces.

5. In a bowl, add in the eggs, almond milk and vanilla extract. Blend together.

6. Mix the wet ingredients with dry ingredients.

7. This would be a good time to add fruit like raspberry, strawberry, or blueberry. Fold gently with fruits.

8. Use a baking tray and lay parchment paper on top. Sprinkle flour on the surface of the parchment paper.

9. Flatten dough and put a wax paper on top. If the dough has too much butter, the dough is too soft. Do use a spoon to scoop the batter on the
baking sheet. The dough should be 1 inch to 1 1/2 inches.

10. Cut circle with biscuit cutter.

11. Bake 20 – 22 minutes.

12. Allow the scone to cool.

Gluten-free Scones
Gluten-free Scones
Gluten-free Scones

Things to know about Scones

These small bread like cake orginated from Scotland. Scones begin in the 1513. There are many variations where English scones are served with butter, jam or cream. American scones types are sweeter and richer in flavor. Scones should be moist with crumbly on the outer layer. Of course, these scones should be buttery. Do try these gluten-free scones.

If you enjoy baked goods, do try gingerbread cookie. I would love to try new cake recipes.

Fig Bar Snack

Fig Bar Snack. We are home all the time my children are snack monsters. There is more opportunity to experiment with new ones. Now, I am attempting to focus on homeschooling my children at home. I never imagine I want to home school, my children. Some moms decide early on to homeschool all their children that is what they want. I admire that. However, I don’t think I have the patience to do this or maybe the skills. And of course, I am not a teacher. With all the studying the children are doing at home, I would need more healthy snacks for energy to replenish the body and the mind.

Fig Bar Snack Recipe

ingredients:

Filling:

1 1/2 cup dried figs

1/2 tsp ground cinnamon

1/4 cup almond milk

1/4 cup water

Crust:

1 3/4 cup almond flour

1/4 cup coconut flour

1 tsp ground cinnamon

1 tsp baking powder

1/2 tsp baking soda

3/4 cup applesauce

Fig Bar Snack
Fig Bar Snack
Fig Bar Snack
Fig Bar Snack

Instructions:

1. Take a baking pan, grease it. Preheat the oven 350-degree Fahrenheit.

2. Take a food processor, blend the dried figs until smooth. With a medium- size bowl, pour the blended figs in the bowl and the rest of the filling ingredients. Mix to combine. Set aside.

3. In a large bowl, mix the crust ingredients until the dough forms.

4. Put on a pair of plastic gloves. In a baking tray, press half of the crust on to the tray. Use a spoon to scoop the fillings, spread the fillings evenly on top of the crust. Then, add the rest of the crust and spread evenly. Press gently.

5. Bake for 30minutes. Remove from oven, allow to cool on a rack before slicing.

Note: the fig bar snack will last for 5 days.

Treat

This wonderful natural sweet gooey fig bar is a wonderful treat. This can be a snack or a treat. When I go shop with my children, my daughter always wants a box of fig bar snacks. Constantly, I remind myself to try making these treats at home, but never got around to attempting it. Figs have a good amount of fiber. It keeps the stomach filling full. Another benefit, figs may even lower cholesterol and controls blood sugar. Surprisingly, fig gives body calcium. If anyone is concerned about osteoporosis, figs will help with this.

Why not give fig bar snack a try. If you are looking for breakfast coconut flour crepes, do read my previous post. I would love to try more interesting recipes like artisan loaf.

Coconut Flour Crepe

Coconut Flour Crepe. Crepes are a lot of fun. They can be sweet and savory. My children love the sweet ones. C and O like to have berries with whip cream. Whip cream is a lot of fun and is delicious. Or, the crepe can be eaten as a dessert with ice cream. What a treat.

Coconut Flour Crepe Recipe

Ingredients:

4 egg

1/2 tbsp. coconut oil(liquid)

1/2 tsp vanilla extract

2 tbsp. coconut flour

1 tbsp. tapioca flour

1/4 tsp salt

Coconut Flour Crepe
Coconut Flour Crepe
Coconut Flour Crepe

Instructions:

1. In a bowl, crack the eggs. Beat the eggs.

2. Then, add in water, coconut oil, and vanilla. Mix. Do add coconut flour, tapioca starch, and salt.

3. Take a whisk to mix and combine. Whisk until there are no clumps.

4. Allow the batter to sit for 10-12 minutes.

5. Spray the pan to prevent sticking.

6. Turn on the stove and pour a scoop of the batter into the pan. Spread it evenly in the pan.

7. Once done. Serve on a plate with your favorite toppings.

History of Crepes

What are crepes? These crepes are thin pancakes. Originated from France. In this past, these are made from salt, water, and flour. The mixture is spread with a wooden scraper to ensure it is round and thin. Thin pancakes can be simple or complex.

Snack

These Coconut flour crepes are high in protein. The treats are nice and thin. Fantastic on the go snacks. An easy one would be with Nutella spread on the inside. Switch the crepe by changing the filling, how about using ricotta to make it creamy. To make a fun snack, let the children drizzle the chocolate syrup or strawberry syrup on top. Building their crepe would be very exciting and fun. Do try coconut flour crepes.

Do try soup good for the body like watercress soup you can have regularly to increase water intake. I would love to try more Chinese soups. And, I would love to try soups like Egg drop soup.